Guide to Painting Over Water Stains Caused by Water Leakage
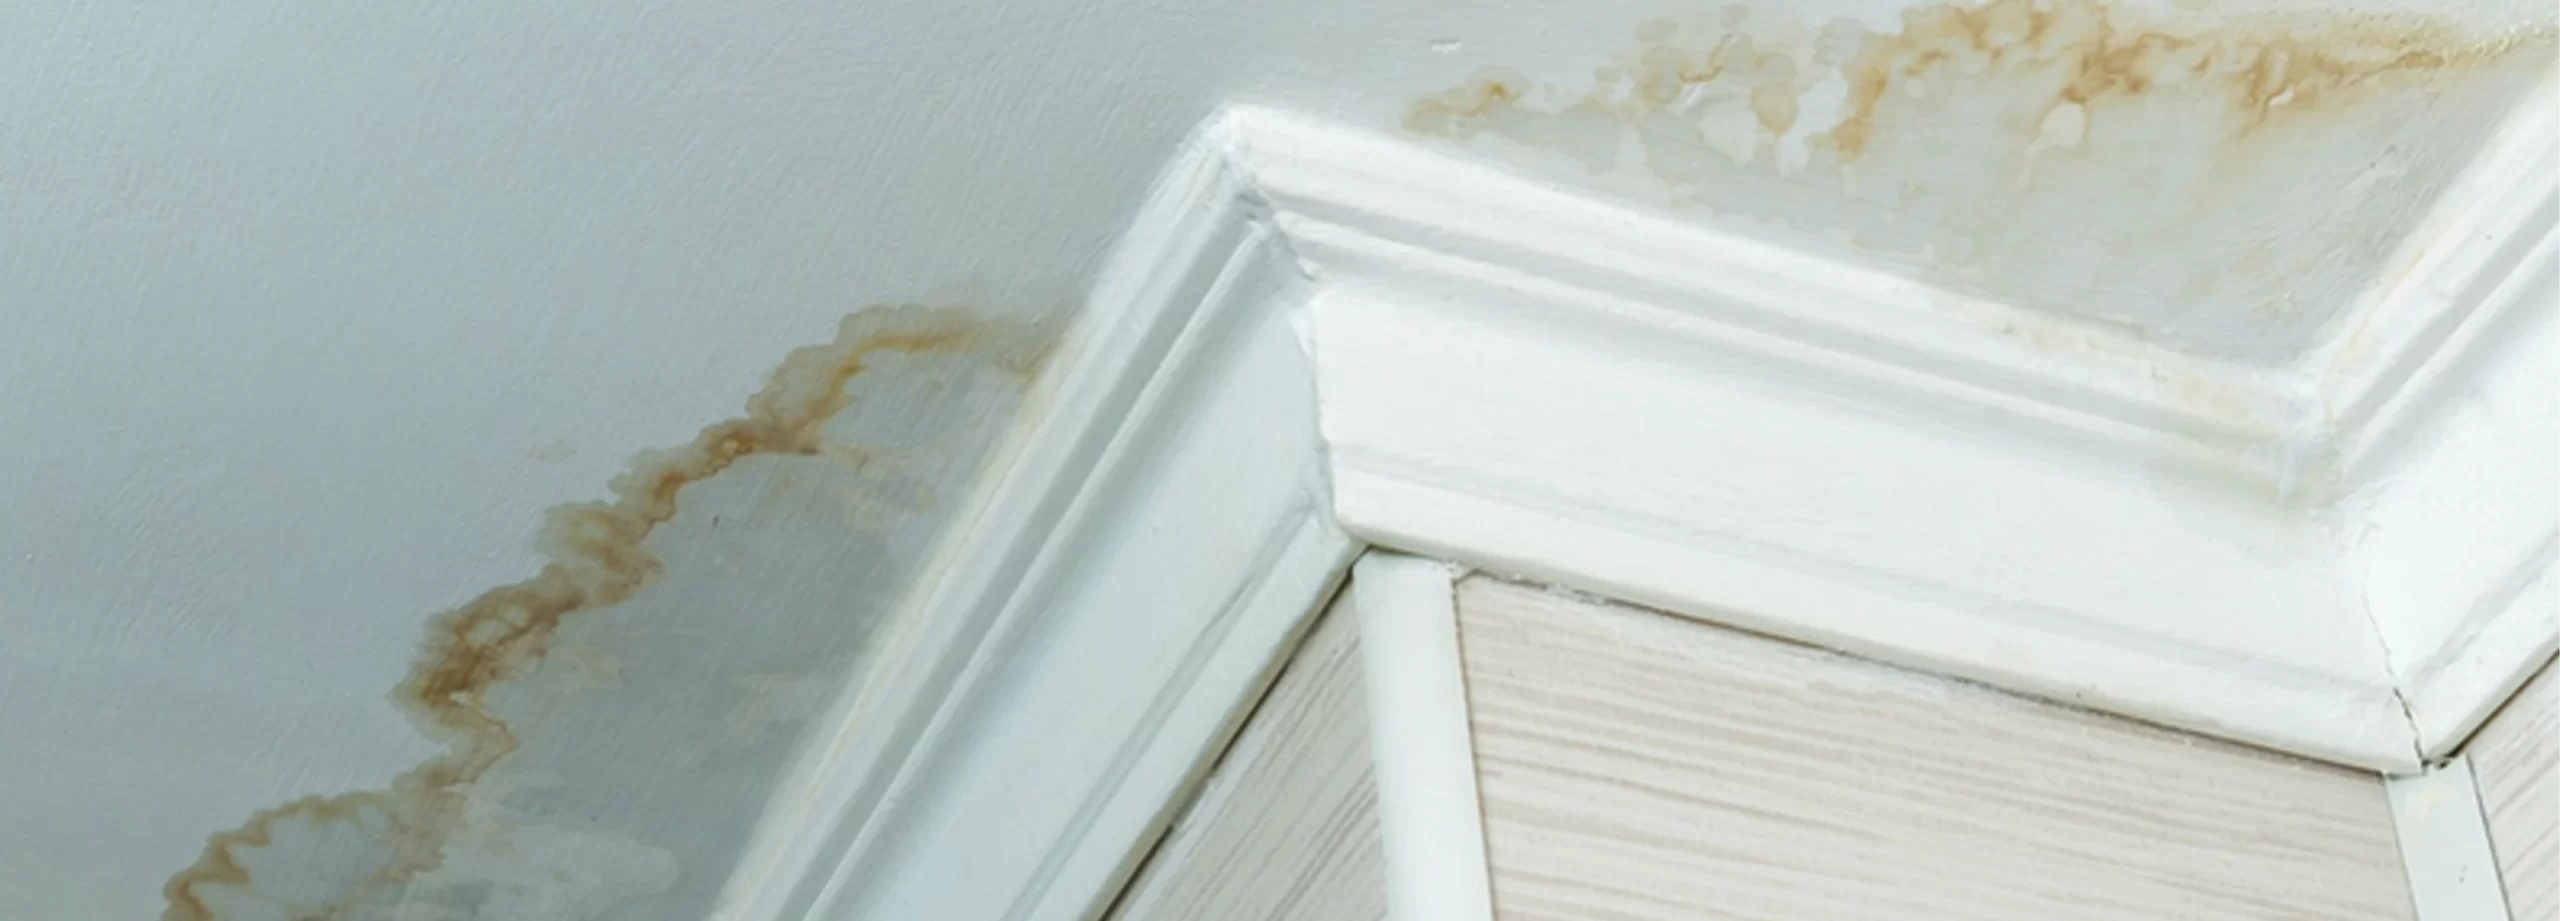
Water stains can be an eyesore, turning your clean walls and ceilings into patchy, unattractive surfaces. Painting over these stains can restore the look of your home, but it’s important to approach this project carefully. Simply adding a new coat of paint won’t solve the problem if the underlying cause of the stain isn’t addressed first. Here’s a step-by-step guide to effectively paint over water leakage stains and achieve a long-lasting finish.
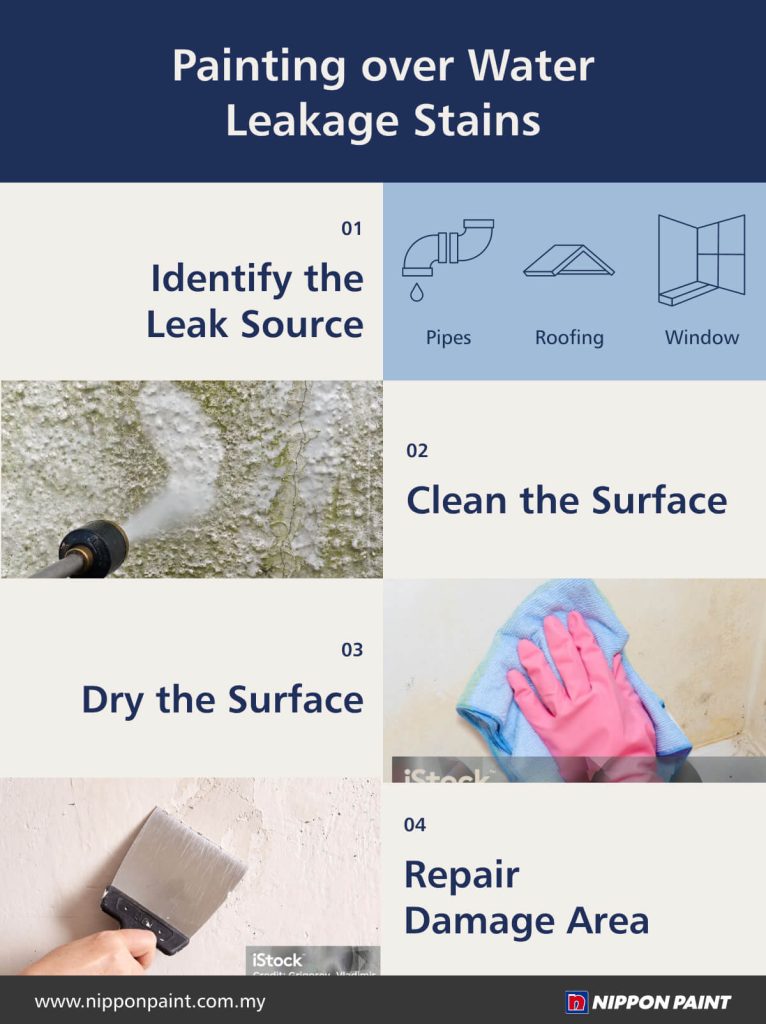
Step 1: Identify and Resolve the Source of the Leakage
Before you begin painting, it’s crucial to find the root cause of the water stain. Painting over the stain without fixing the source will only lead to the stain reappearing, no matter how many layers of paint you apply. Check for leaks in pipes, roofing, or windows, wherever water may be seeping in. For example, if the stain is near a window, inspect for any gaps or cracks that might be letting moisture through. Fixing the leak at its source ensures that your painting efforts will not go to waste.
Step 2: Clean, Dry, and Prepare the Area
Once you’ve addressed the source of the leak, the next step is to clean and dry the stained area. Water stains often lead to mould and mildew growth, which can create additional damage. Here’s how to prepare the surface:
Clean the Stain Use a mould-cleaning product to thoroughly remove any mould or mildew that may have developed around the stain. Nippon Paint Fungicidal Wash can effectively eliminate mould, bacteria, fungi, and algae on surfaces, preventing them from spreading.
Dry the Wall Completely Ensure the wall or ceiling is completely dry before painting. You can speed up the drying process by using a dehumidifier or opening windows to increase airflow in the room. Painting on a damp surface will only trap moisture inside, causing future problems.
Repair Any Damaged Areas If the water has caused visible damage, such as cracks or peeling paint, repair these areas before painting. For instance, fill any wall cracks with Nippon Paint Crackrepair 1000 and sand the area using Nippon Paint Abrasive Waterproof Sandpaper for a smooth finish. This step will help your paint adhere better and create a polished, even look.
Step 3: Apply Waterproofing Solutions and Use Our Recommended Coating System
It’s essential to use the right products in the correct order to protect your walls from future water damage and ensure the stain does not bleed through.
Waterproofing with Nippon Paint Start by applying suitable waterproofing products tailored to the specific area. For example, on exposed flat roofs, use Nippon Paint Nipposeal Flex 200 Fibre Pro, a liquid membrane coating that forms an excellent barrier against moisture penetration. For indoor areas prone to moisture, such as toilets and basements, Nipposeal Flex 100 is highly effective. These waterproofing solutions provide a reliable protective layer, preventing water infiltration and protecting your walls and surfaces from the challenges of Malaysia’s humid climate.
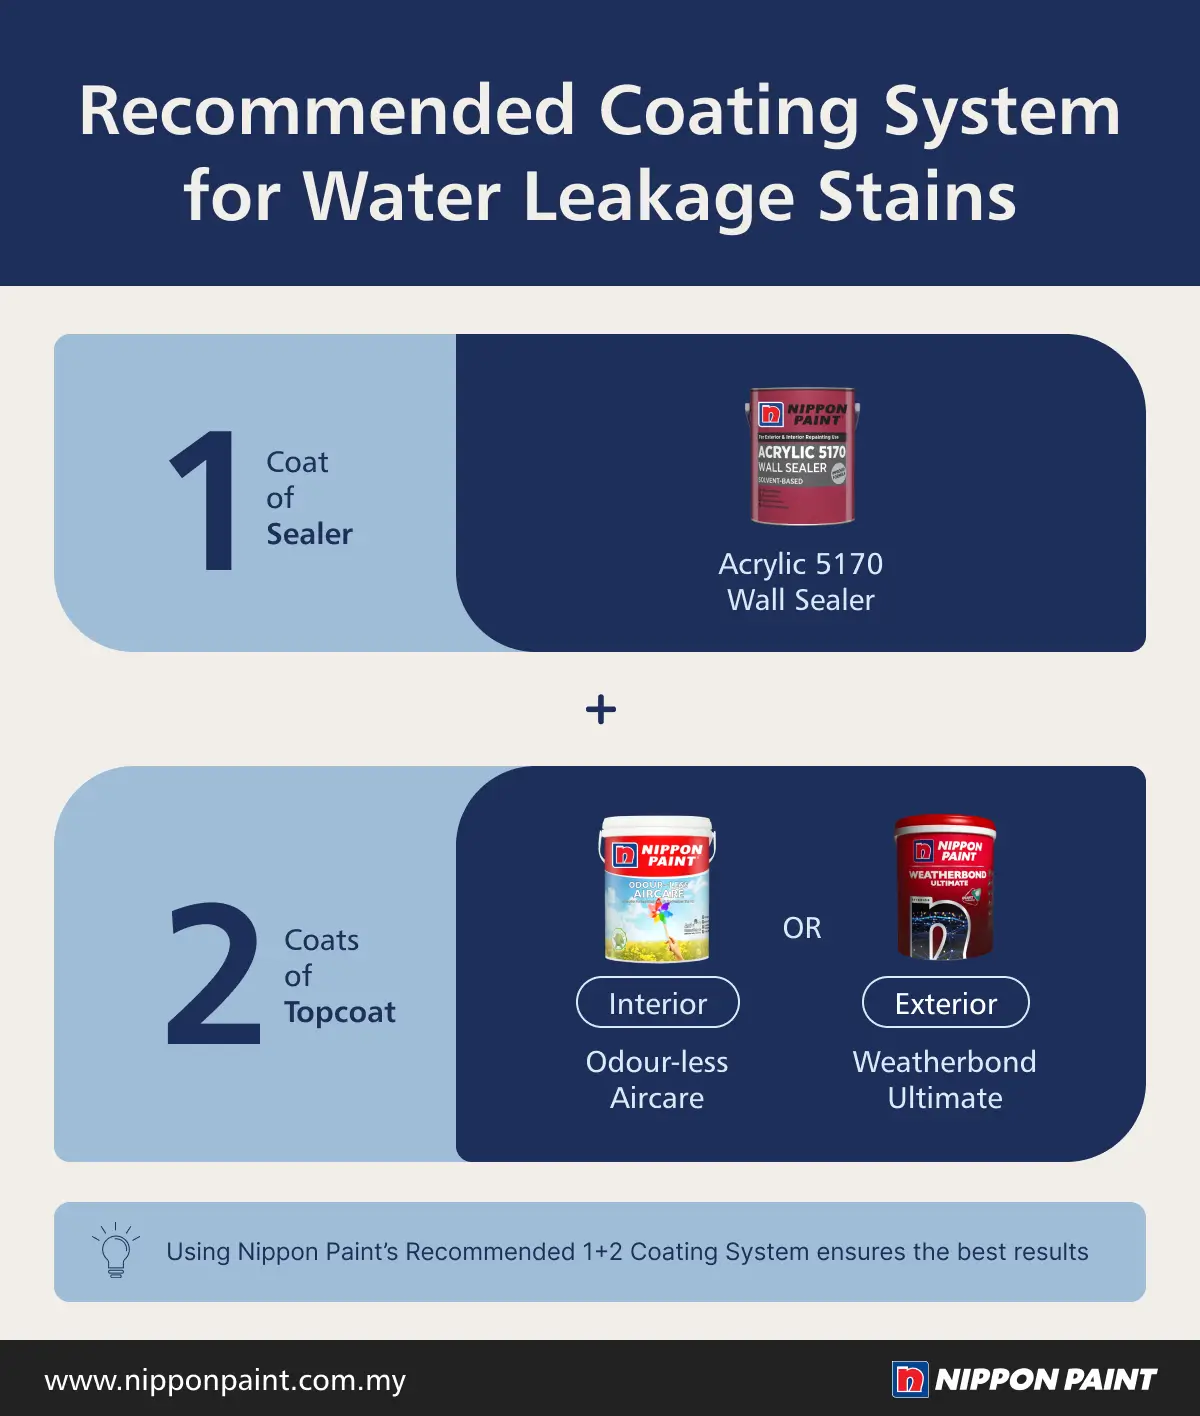
Apply a Layer of Sealer Paint After applying the waterproofing layer, the next step is to use a sealer. Nippon Paint Acrylic 5170 Wall Sealer is a great option for both interior and exterior walls. It enhances paint adhesion, prevents issues like efflorescence (white deposits), and works well on chalky or powdery surfaces. This sealer provides a smooth base for the topcoat and ensures a durable finish. For areas like kitchens or bathrooms, where moisture is common, it also helps block stains from reappearing through the new paint.
Finish with Two Coats of Topcoat Once the sealer has dried, it’s time to apply the topcoat. For interior walls, consider using Nippon Paint Odour-less AirCare, which has Hi-Build Technology to create a thicker protective layer. This paint is ideal for indoor spaces as it helps cover imperfections and has odourless properties, making it comfortable to apply indoors. For exterior walls, the Nippon Paint Weatherbond Ultimate offers enhanced durability with its advanced Quartz and Fibra Technology, making it an excellent choice to withstand harsh weather conditions like rain and sunlight. Applying two layers of this topcoat ensures a smooth, even finish while providing superior protection against future stains and environmental wear.
Step 4: Monitor for Recurrence of Stains
After painting over the water stains, periodically check the area to ensure that the water leakage issue is truly resolved and that the stain doesn’t return.
Conclusion
Painting over water stains requires proper preparation to achieve a long-lasting finish. Nippon Paint recommends using its trusted coating system, starting with one layer of sealer to create a strong base, followed by two layers of topcoat for added durability and protection. This approach ensures your walls stay smooth and pristine, restoring the beauty of your space while keeping your home looking fresh and well-maintained.