How to Prevent Metal Surfaces from Rusting with Paint
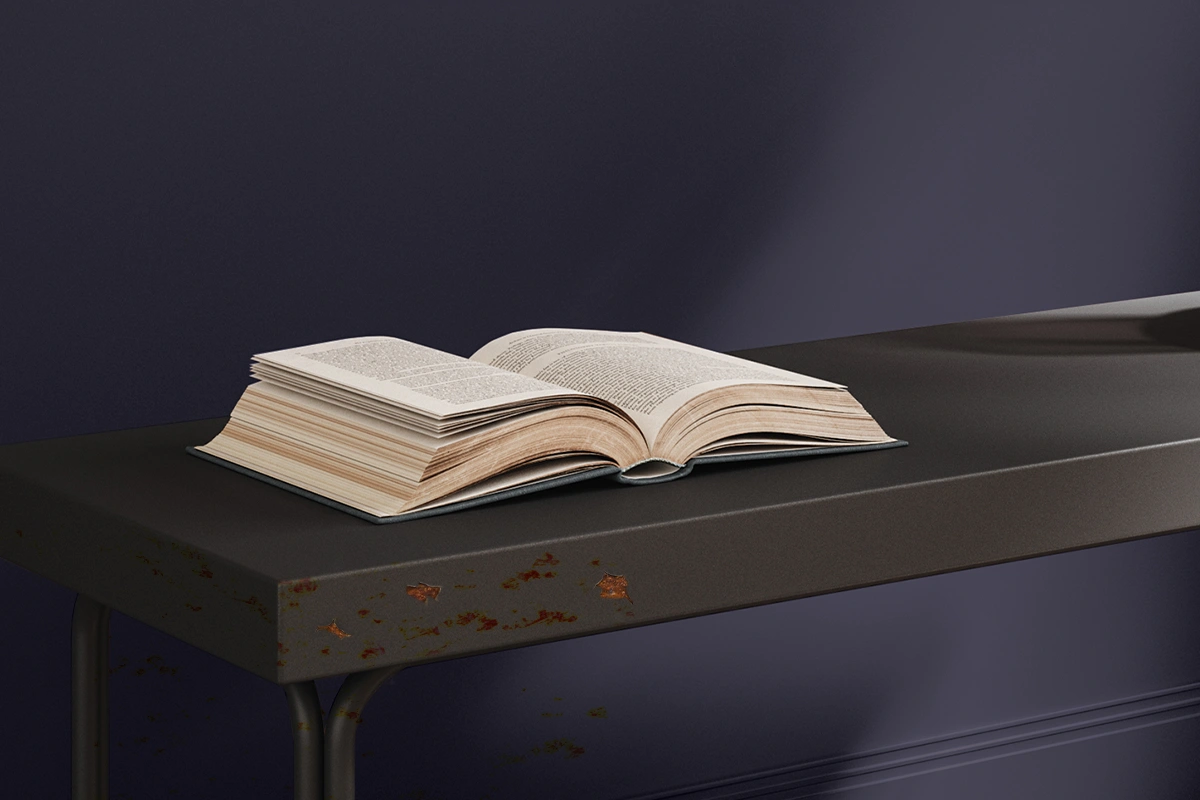
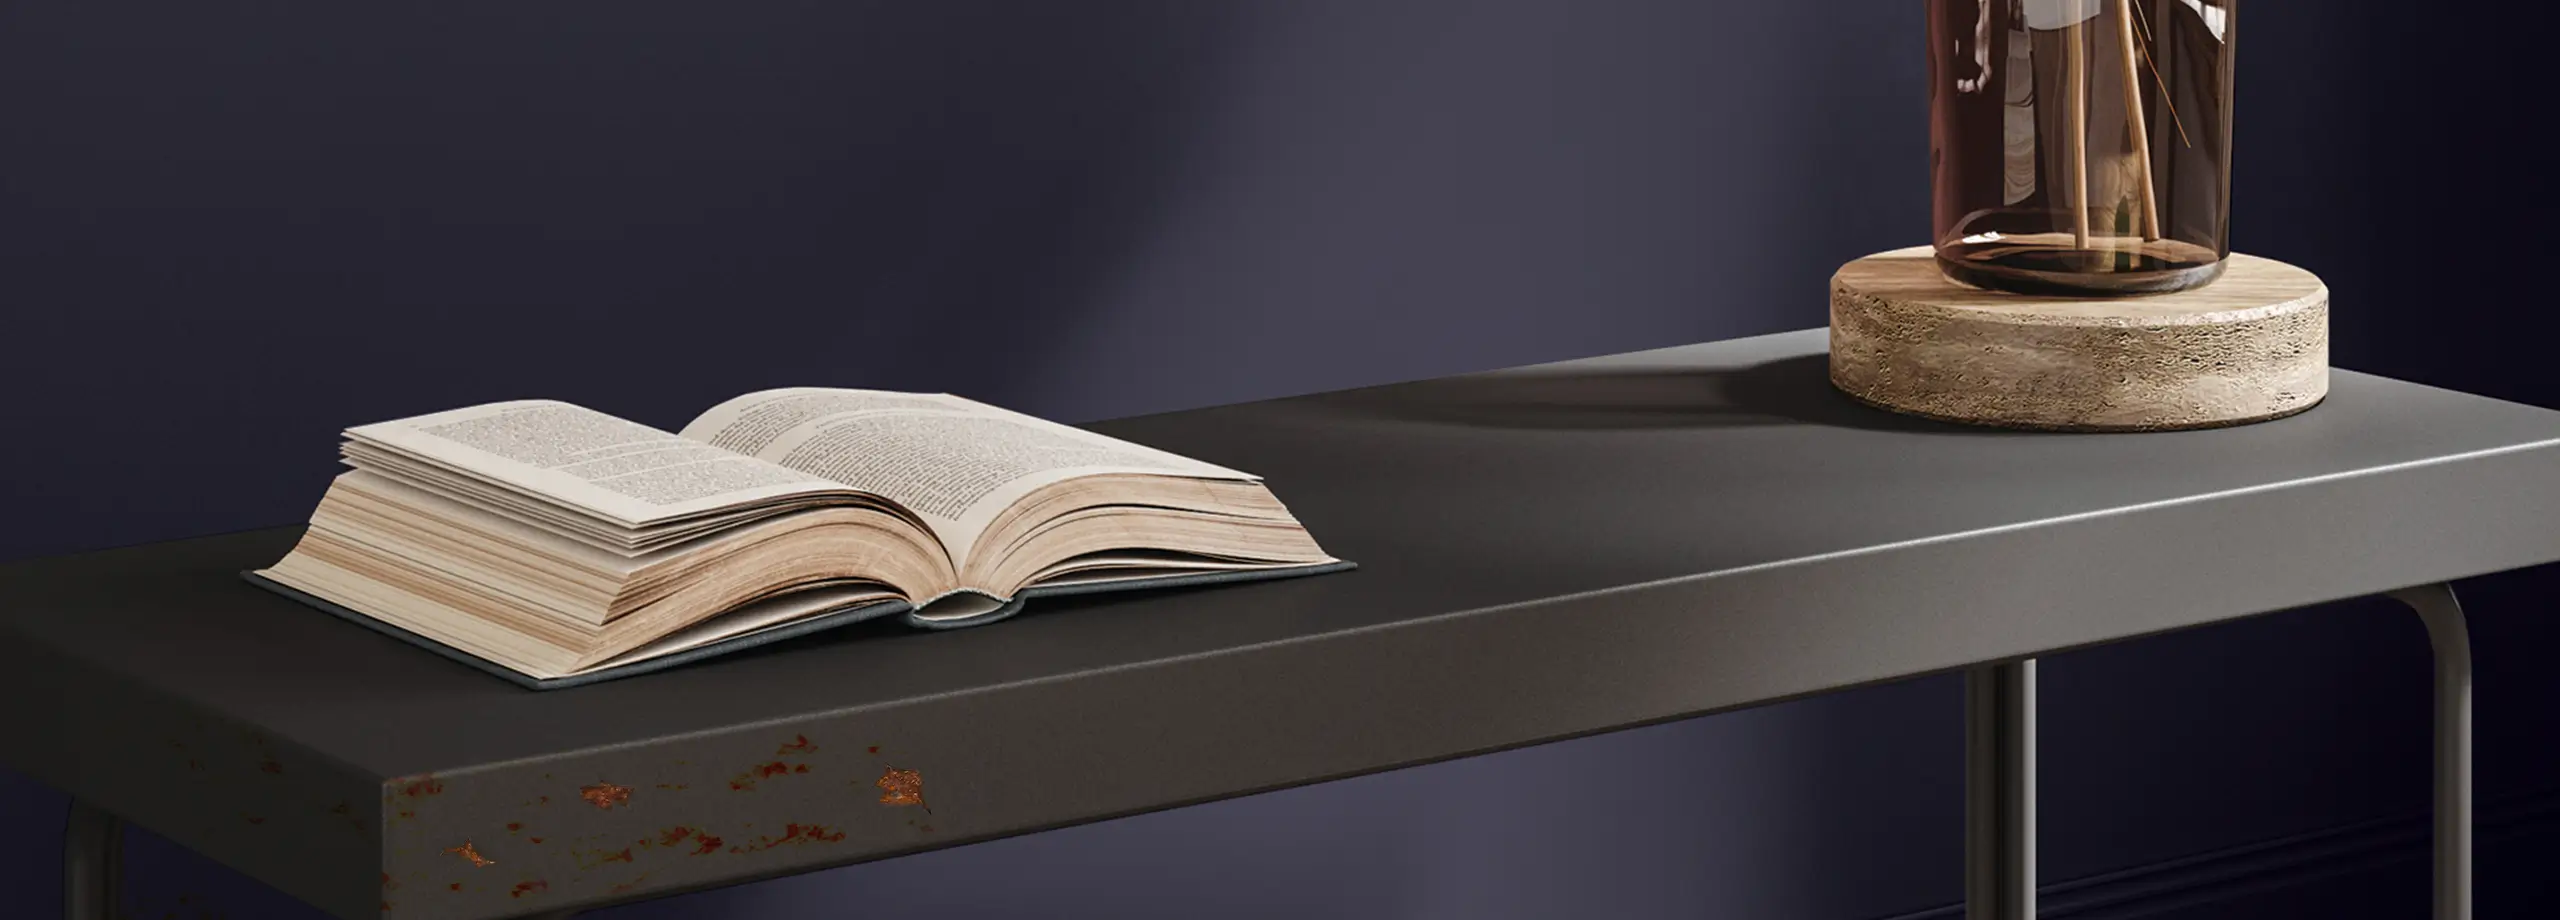
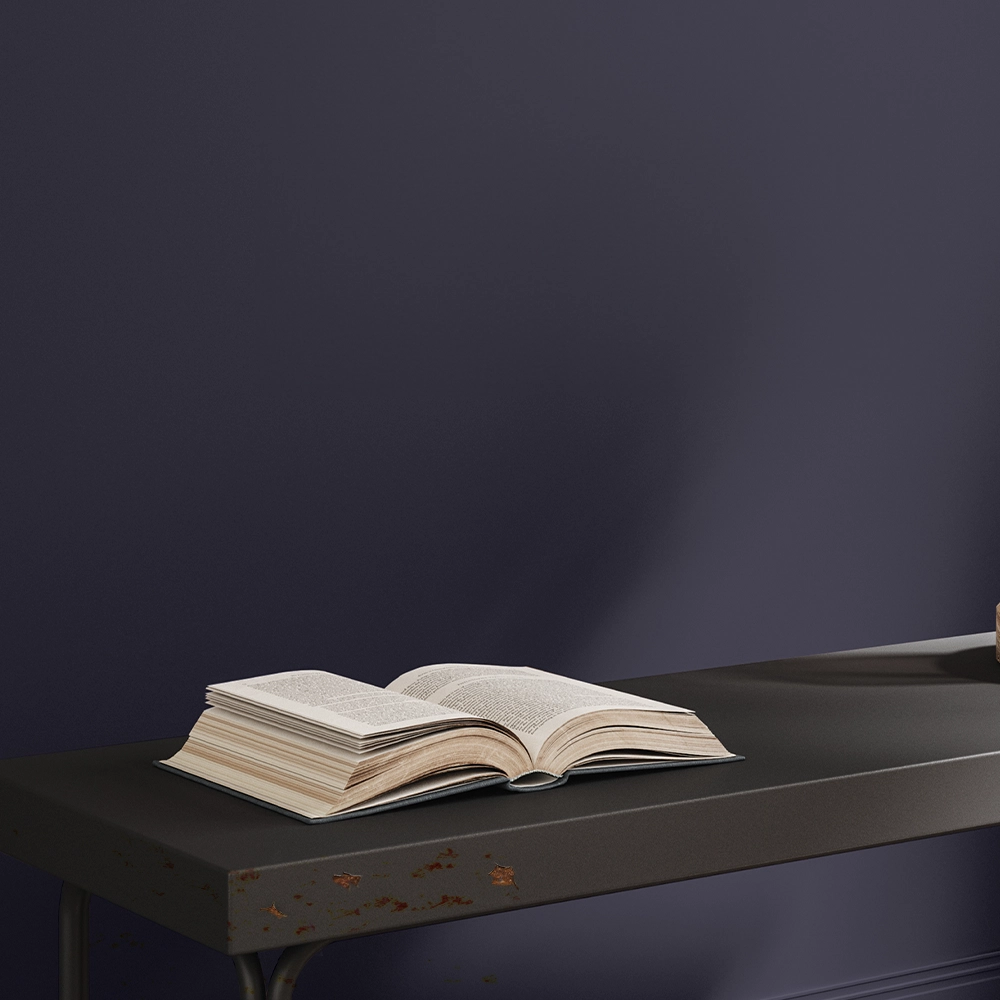
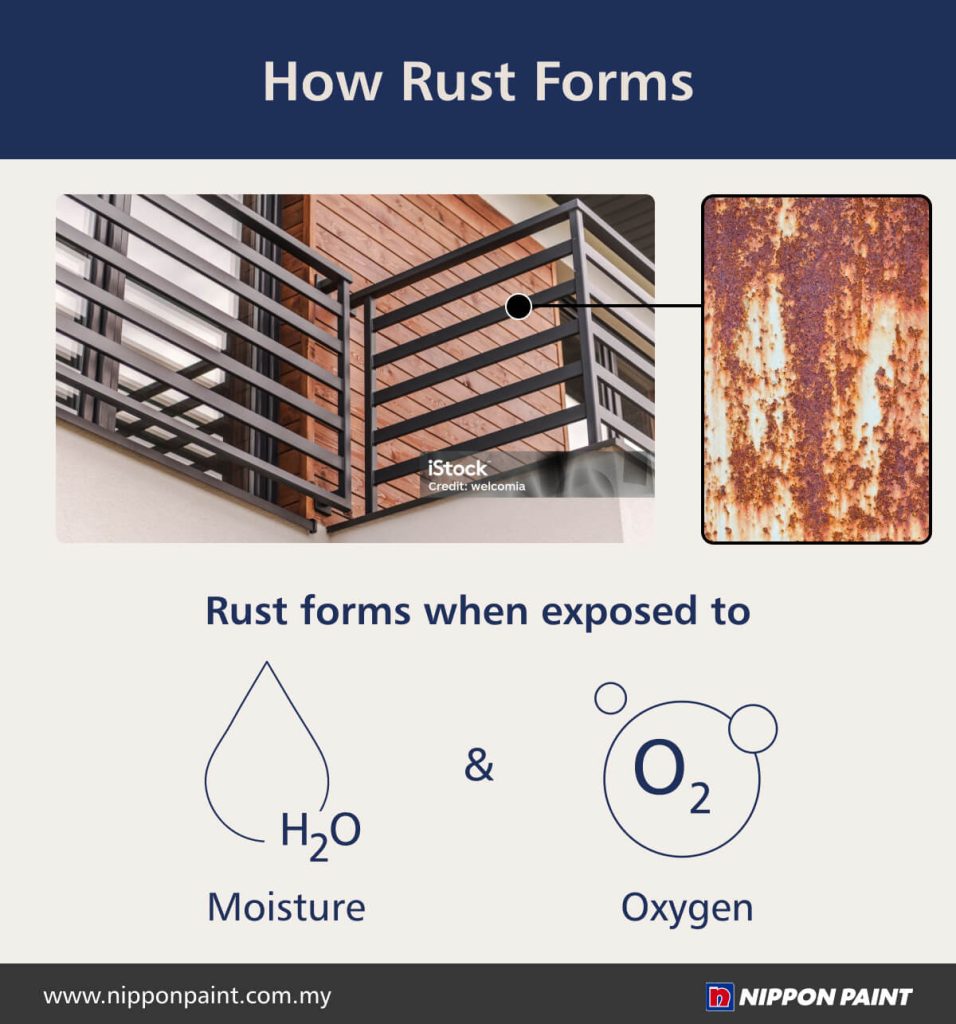
Rust is a common issue that affects metal surfaces when exposed to moisture and oxygen over time. This natural process, known as rusting, gradually weakens the metal and can cause significant damage if left untreated. Beyond compromising the structural integrity of metal surfaces, rust can spread rapidly, accelerating deterioration and increasing repair costs.
One of the most effective ways to protect metal surfaces from rust is by applying anti-rust paint. Paint acts as a durable barrier, preventing moisture and oxygen from reaching the surface, which halts the rusting process. In this article, we’ll walk you through the proper steps to paint metal surfaces and share the best practices for ensuring your property remains strong, durable, and rust-free for years to come.
How to Prevent Rust on Metal Surfaces with Paint
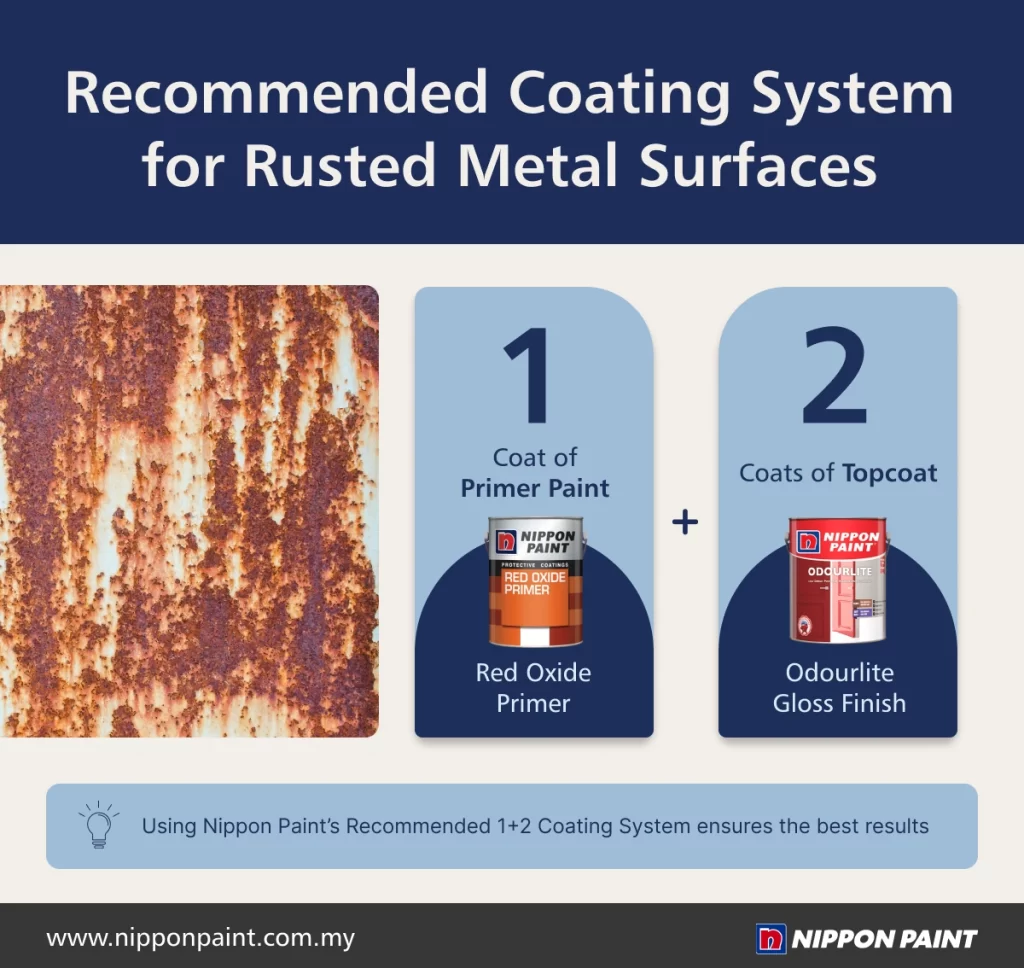
Preventing rust starts with proper surface preparation and using high-quality anti-rust primers and topcoats designed for metal. Nippon Paint’s recommended coating system, which includes one layer of primer and two layers of topcoat, provides a strong protective barrier that keeps your metal surfaces looking great and resistant to rust. By following these steps, you can ensure long-lasting durability and protection for your metal surfaces.
Step 1: Surface Preparation
The first step in rust prevention is to clean and smooth the surface. Remove loose rust, old paint, and dirt with a wire brush or Nippon Paint Abrasive Waterproof Sandpaper. For heavily rusted areas, use a rust remover. Sand rough edges and wipe with a damp cloth to remove dust. Ensure the surface is completely dry before applying primer, as moisture can affect adhesion. Proper preparation is key to achieving a durable, long-lasting finish.
Step 2: Apply a Rust-Preventive Primer
Once the surface is prepared, apply a high-quality anti-rust primer like Nippon Paint Aquatec Red Oxide Primer, which is specially formulated to resist corrosion. This primer creates a strong bond with the metal, sealing the surface and preventing moisture and oxygen from penetrating. A single, even coat provides an excellent foundation for the topcoat, ensuring a smoother application and enhanced durability.
Step 3: Use a Durable Topcoat
After the primer has dried completely, apply two coats of a durable anti-rust topcoat, such as Nippon Paint Odourlite Finish – Gloss. This oil-modified alkyd enamel is designed for metal surfaces and provides exceptional resistance to weather, moisture, and everyday wear and tear. The gloss finish enhances the appearance of the metal while adding an additional layer of protection against rust and environmental damage. Make sure the first coat dries completely before applying the second to achieve optimal results.
Regular cleaning and inspections of painted surfaces are equally important for prolonging the life of your protective coatings. Small scratches or wear should be addressed immediately to prevent rust from taking hold.
Conclusion
In Malaysia’s hot and humid climate, proper protection for metal surfaces is essential to combat accelerated rusting. By following Nippon Paint’s recommended coating system, which includes one layer of primer and two layers of topcoat, you can safeguard your metal surfaces against rust and corrosion.
With Nippon Paint’s rust-preventive solutions and regular maintenance, your metal surfaces, from gates and fences to industrial equipment, will remain strong, durable, and visually appealing for years to come. Taking these proactive steps now ensures long-term protection and peace of mind.
Guide to Painting Over Water Stains Caused by Water Leakage
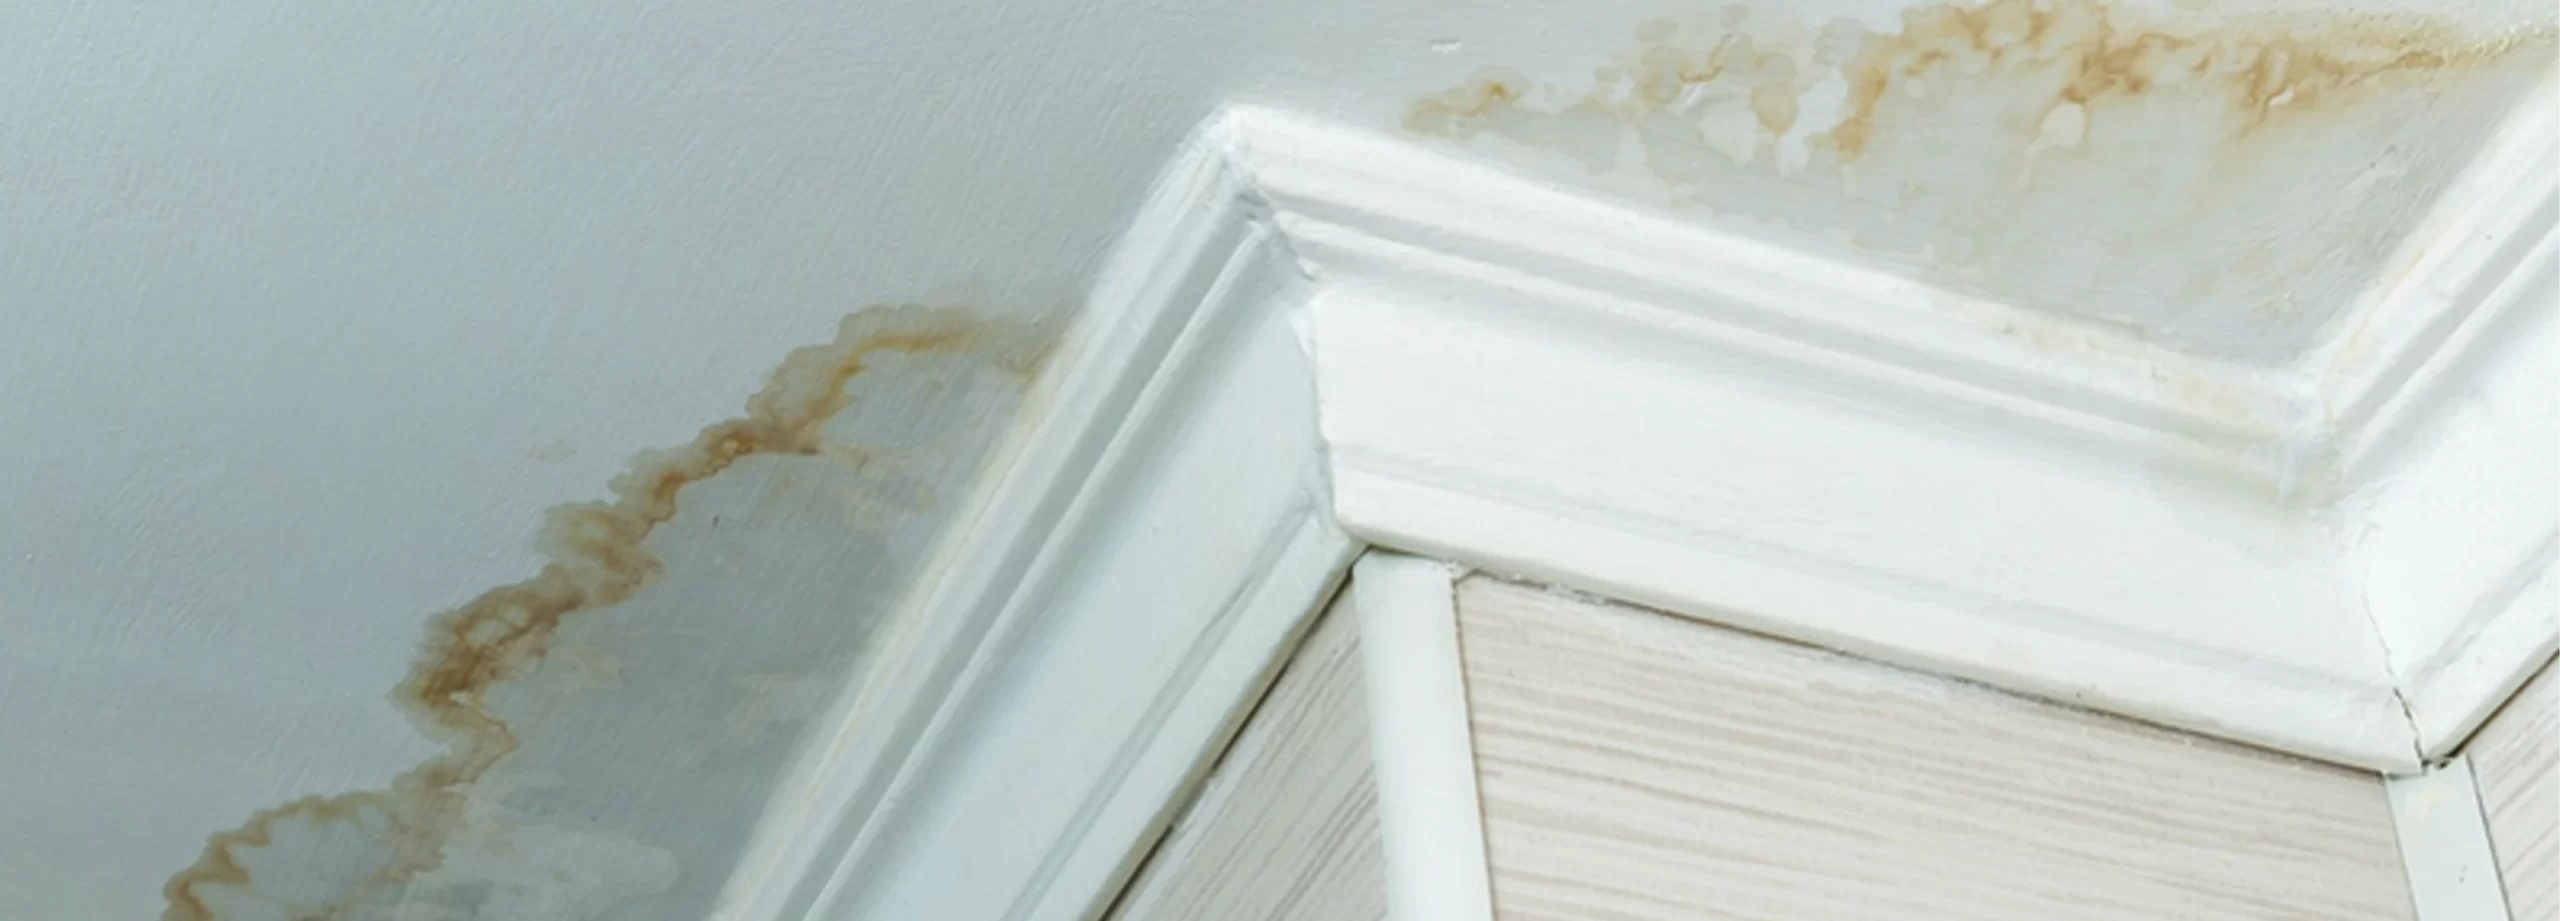
Water stains can be an eyesore, turning your clean walls and ceilings into patchy, unattractive surfaces. Painting over these stains can restore the look of your home, but it’s important to approach this project carefully. Simply adding a new coat of paint won’t solve the problem if the underlying cause of the stain isn’t addressed first. Here’s a step-by-step guide to effectively paint over water leakage stains and achieve a long-lasting finish.
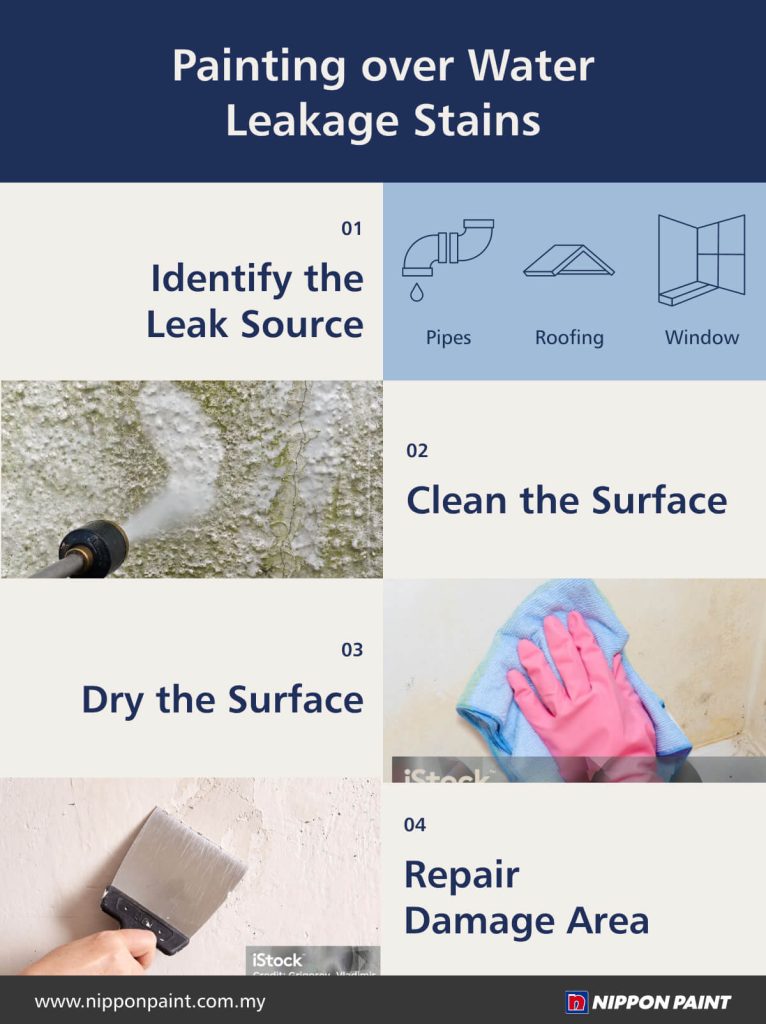
Step 1: Identify and Resolve the Source of the Leakage
Before you begin painting, it’s crucial to find the root cause of the water stain. Painting over the stain without fixing the source will only lead to the stain reappearing, no matter how many layers of paint you apply. Check for leaks in pipes, roofing, or windows, wherever water may be seeping in. For example, if the stain is near a window, inspect for any gaps or cracks that might be letting moisture through. Fixing the leak at its source ensures that your painting efforts will not go to waste.
Step 2: Clean, Dry, and Prepare the Area
Once you’ve addressed the source of the leak, the next step is to clean and dry the stained area. Water stains often lead to mould and mildew growth, which can create additional damage. Here’s how to prepare the surface:
Clean the Stain Use a mould-cleaning product to thoroughly remove any mould or mildew that may have developed around the stain. Nippon Paint Fungicidal Wash can effectively eliminate mould, bacteria, fungi, and algae on surfaces, preventing them from spreading.
Dry the Wall Completely Ensure the wall or ceiling is completely dry before painting. You can speed up the drying process by using a dehumidifier or opening windows to increase airflow in the room. Painting on a damp surface will only trap moisture inside, causing future problems.
Repair Any Damaged Areas If the water has caused visible damage, such as cracks or peeling paint, repair these areas before painting. For instance, fill any wall cracks with Nippon Paint Crackrepair 1000 and sand the area using Nippon Paint Abrasive Waterproof Sandpaper for a smooth finish. This step will help your paint adhere better and create a polished, even look.
Step 3: Apply Waterproofing Solutions and Use Our Recommended Coating System
It’s essential to use the right products in the correct order to protect your walls from future water damage and ensure the stain does not bleed through.
Waterproofing with Nippon Paint Start by applying suitable waterproofing products tailored to the specific area. For example, on exposed flat roofs, use Nippon Paint Nipposeal Flex 200 Fibre Pro, a liquid membrane coating that forms an excellent barrier against moisture penetration. For indoor areas prone to moisture, such as toilets and basements, Nipposeal Flex 100 is highly effective. These waterproofing solutions provide a reliable protective layer, preventing water infiltration and protecting your walls and surfaces from the challenges of Malaysia’s humid climate.
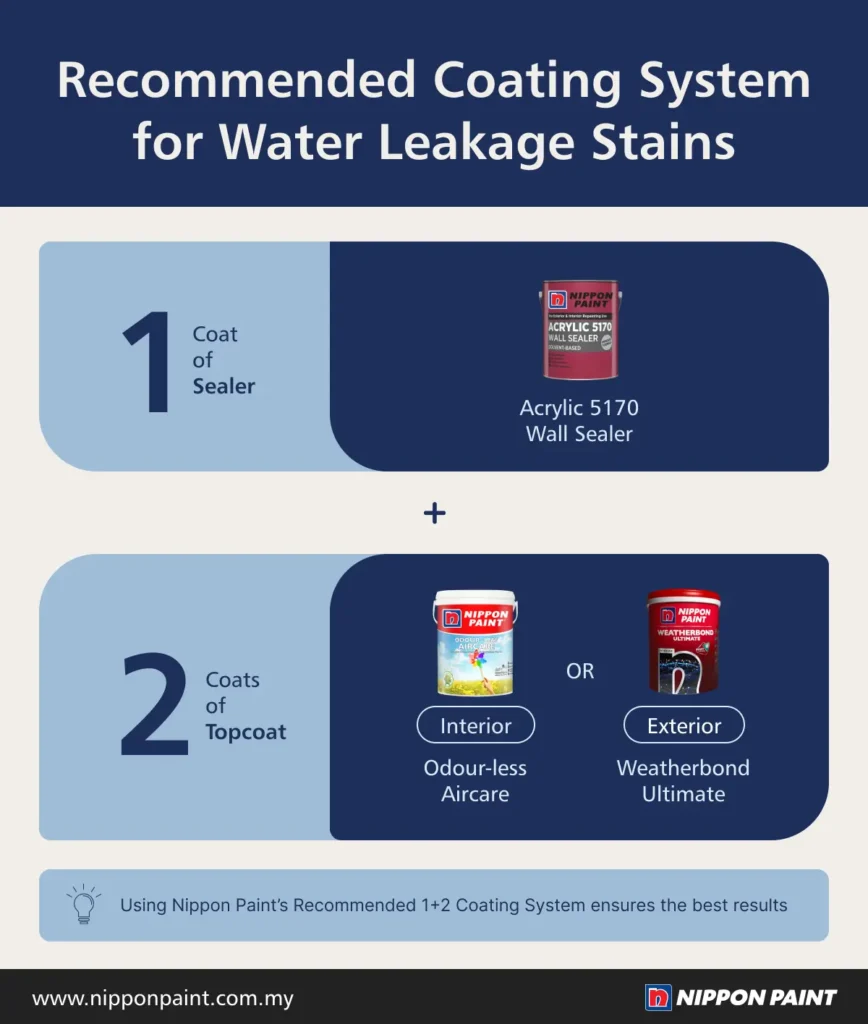
Apply a Layer of Sealer Paint After applying the waterproofing layer, the next step is to use a sealer. Nippon Paint Acrylic 5170 Wall Sealer is a great option for both interior and exterior walls. It enhances paint adhesion, prevents issues like efflorescence (white deposits), and works well on chalky or powdery surfaces. This sealer provides a smooth base for the topcoat and ensures a durable finish. For areas like kitchens or bathrooms, where moisture is common, it also helps block stains from reappearing through the new paint.
Finish with Two Coats of Topcoat Once the sealer has dried, it’s time to apply the topcoat. For interior walls, consider using Nippon Paint Odour-less AirCare, which has Hi-Build Technology to create a thicker protective layer. This paint is ideal for indoor spaces as it helps cover imperfections and has odourless properties, making it comfortable to apply indoors. For exterior walls, the Nippon Paint Weatherbond Ultimate offers enhanced durability with its advanced Quartz and Fibra Technology, making it an excellent choice to withstand harsh weather conditions like rain and sunlight. Applying two layers of this topcoat ensures a smooth, even finish while providing superior protection against future stains and environmental wear.
Step 4: Monitor for Recurrence of Stains
After painting over the water stains, periodically check the area to ensure that the water leakage issue is truly resolved and that the stain doesn’t return.
Conclusion
Painting over water stains requires proper preparation to achieve a long-lasting finish. Nippon Paint recommends using its trusted coating system, starting with one layer of sealer to create a strong base, followed by two layers of topcoat for added durability and protection. This approach ensures your walls stay smooth and pristine, restoring the beauty of your space while keeping your home looking fresh and well-maintained.
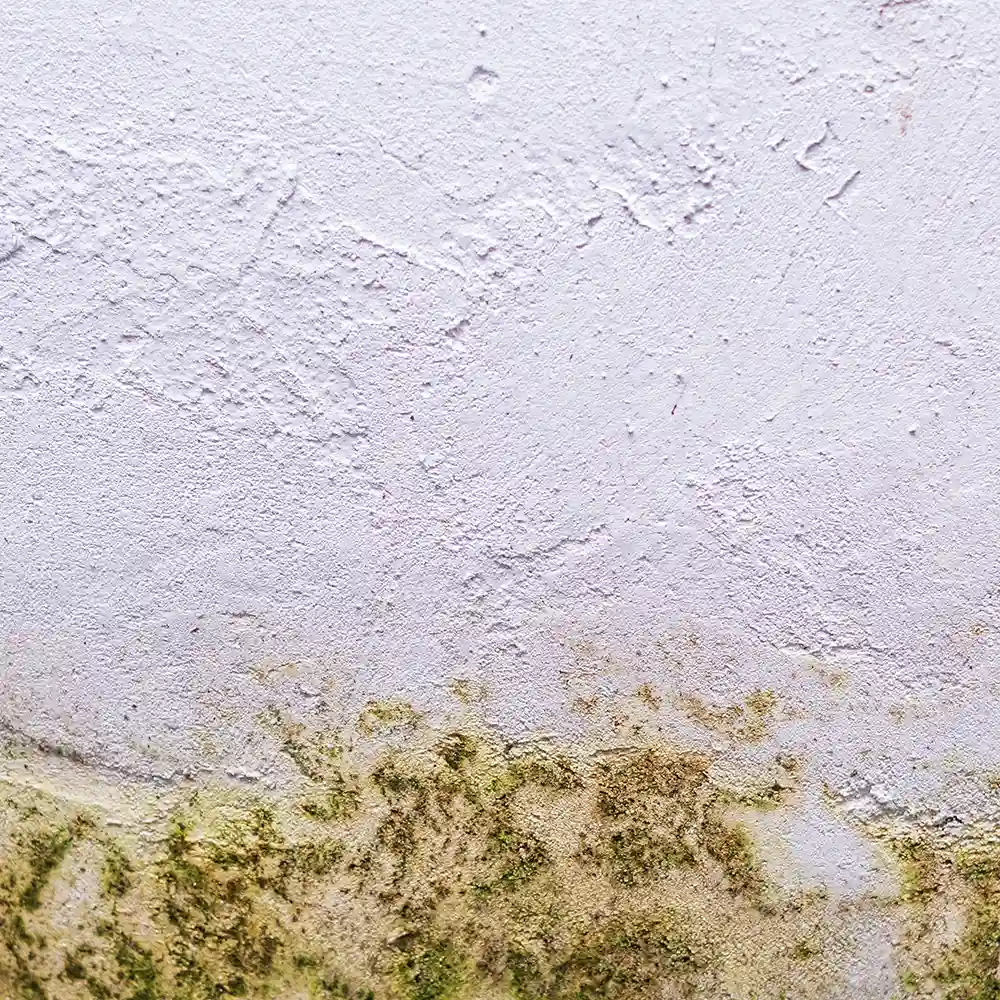
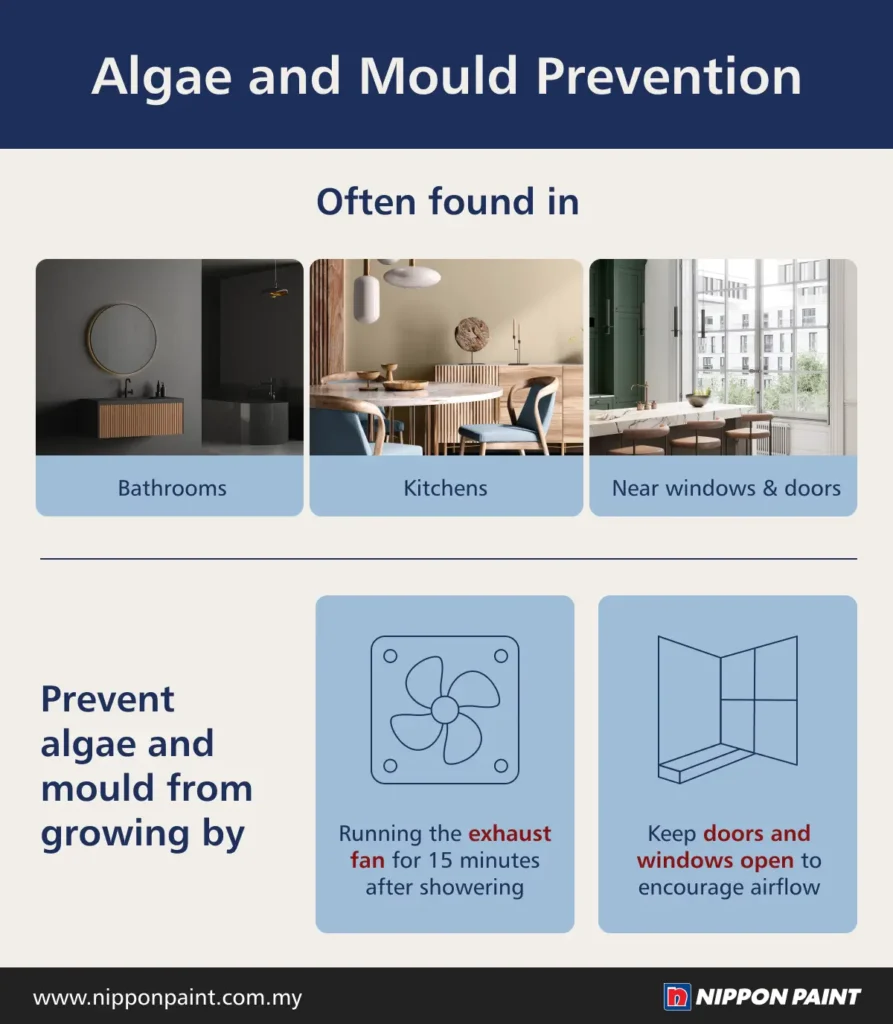
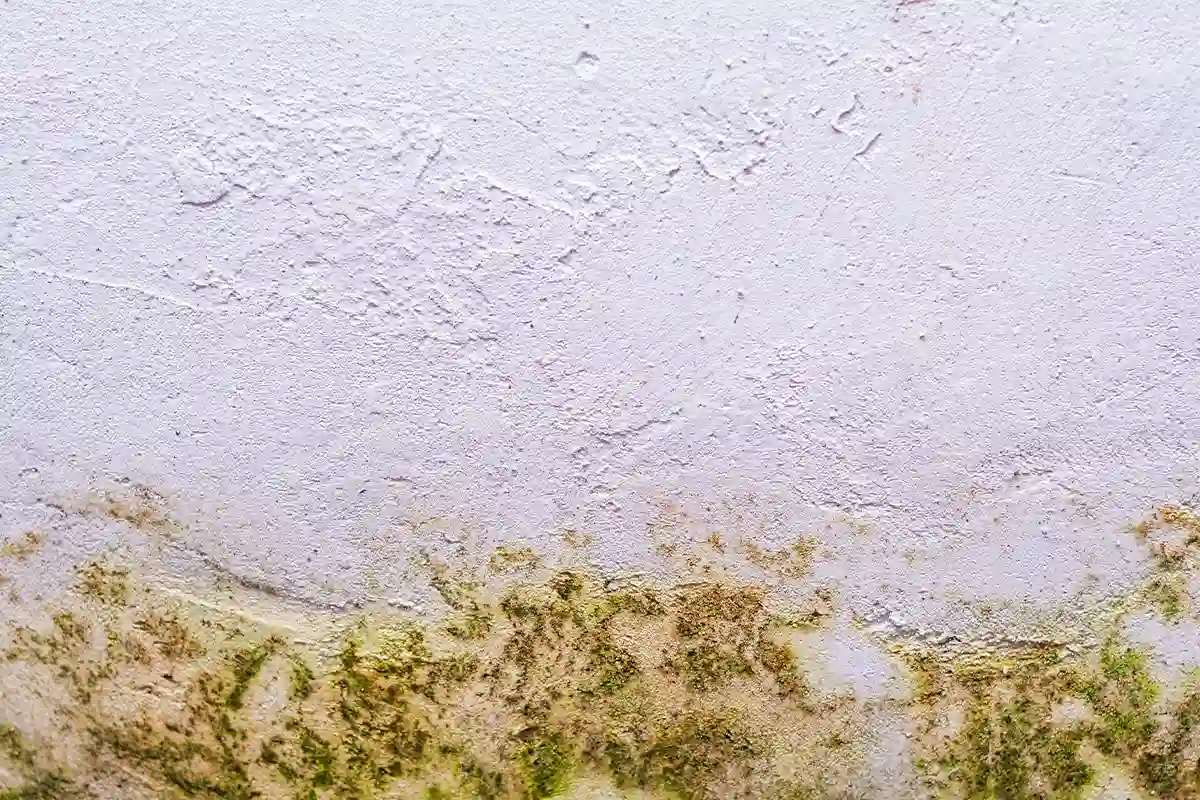
Mould and algae stains are a common problem in older buildings, often appearing as unsightly green, brown, or black patches. In Malaysia’s humid climate, these issues are often caused by water seepage from exterior walls into indoor spaces, creating the perfect conditions for mould to thrive. Bathrooms, kitchens, and areas around windows and doors are especially vulnerable due to moisture accumulation, while leaking pipes, damaged roofs, and poor ventilation further contribute to the problem. Using low-quality paint or painting over existing fungal issues without proper treatment can also lead to recurring mould growth.
Wondering How You can Protect Your Walls From Fungus and Mould?
Prevention starts with managing indoor moisture levels and improving air circulation. Proper ventilation is key. Turn on exhaust fans after showering and keep them running for at least 15 minutes to expel moisture-laden air. Avoid sealing off interior spaces by keeping doors and windows open whenever possible to allow airflow, which helps dry out excess moisture.
Additionally, appliances like air conditioners and air purifiers with a dehumidifier function can significantly reduce humidity. These devices maintain relative humidity below 50%, creating an environment less favourable for mould growth. By implementing these strategies, you can make your home less susceptible to mould and maintain a healthier living environment.
How to Prepare and Repaint Walls Affected by Mould?
Prevention is key when it comes to mould, but in Malaysia’s hot and humid weather, mould can still develop despite your best efforts. When this happens, it is important to address walls affected by mould growth effectively.
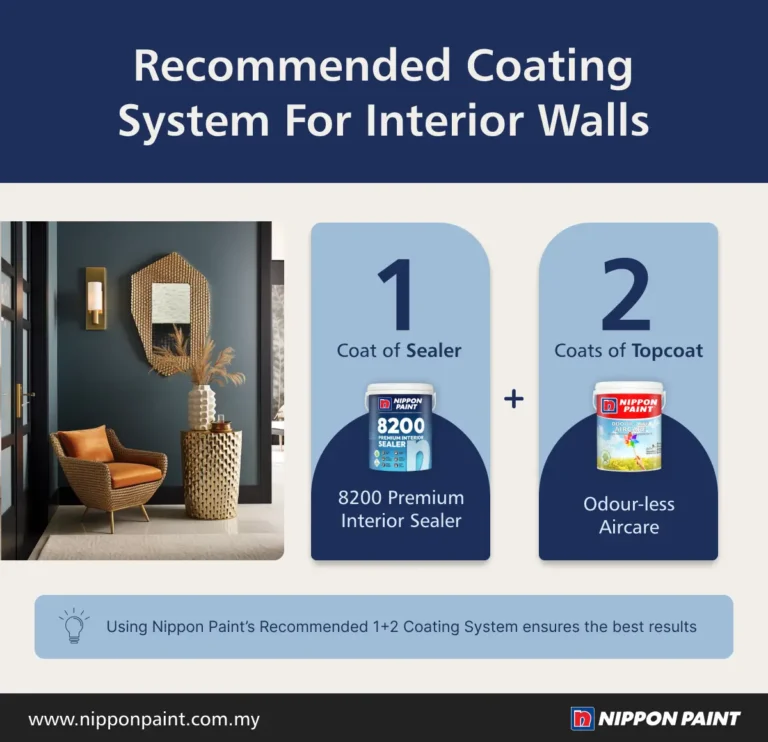
Proper preparation is crucial to completely eliminate mould and ensure the new paint adheres properly. Nippon Paint’s recommended 1+2 coating system provides an ideal solution. This method involves applying one layer of sealer to create a strong base, followed by two layers of topcoat for enhanced durability and long-lasting protection. By following these steps, you can restore your walls and protect them from future mould damage.
Step 1: Surface Preparation
Begin by thoroughly cleaning the mould-affected area. Remove all visible algae, fungus, or mould growth by scrubbing or washing the surface with a soft brush and water. For stubborn mould, apply Nippon Paint Fungicidal Wash, a low-toxicity fungal and algae wash that kills all surface fungal spores. Apply the solution to the affected area by spraying, scrubbing, or painting it on, and let it sit for at least 24 hours or overnight for optimal results.
After cleaning, rinse off the solution and allow the wall to dry completely. Skipping this step can trap moisture in the wall, leading to recurring mould growth or peeling paint later. Proper drying is essential for a long-lasting finish.
Step 2: Apply a Sealer
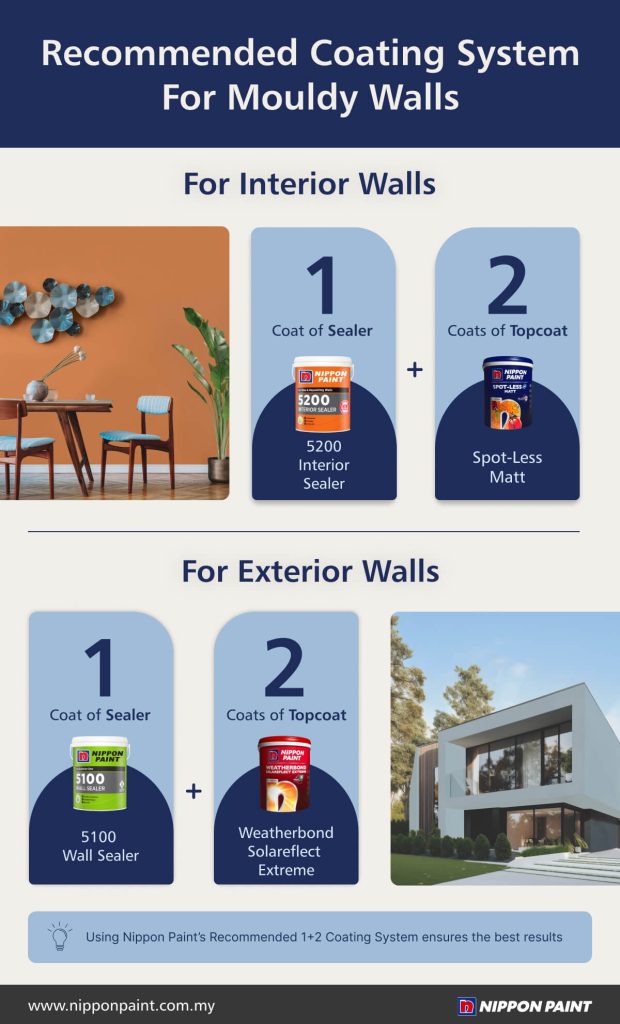
Once the surface is prepared, apply one layer of Nippon Paint 5200 Interior Sealer for the interior wall. This high-performance sealer protects against moisture and mild alkalinity from the substrate, creating a stable foundation for the topcoat. It also prevents stains from seeping through and ensures proper adhesion, making it particularly effective for walls previously affected by mould or moisture damage.
For exterior walls or spaces prone to high moisture levels, applying a sealer is even more important as it acts as a barrier, Nippon Paint 5100 Wall Sealer is your best choice, it resists further fungal growth and prolongs the durability of the paint.
Step 3: Apply Two Coats of Topcoat
After the sealer has dried, apply two coats of topcoat for a flawless finish. For interior walls, use Nippon Paint Spotless-Plus, a premium topcoat that offers excellent washability and coverage. It also absorbs harmful formaldehyde, improving indoor air quality and making it an ideal choice for living rooms, bedrooms, and kitchens.
For exterior walls, choose Nippon Paint Weatherbond Solareflect Extreme, a weather-resistant topcoat designed to withstand Malaysia’s harsh outdoor conditions. It reduces surface temperatures, protects walls from UV damage, and provides a long-lasting barrier against rain and humidity. Ensure that the first coat is fully dry before applying the second for optimal results.
Conclusion
Mould growth can harm both the appearance and air quality of your home, leading to health issues such as allergies, asthma, itchy eyes, sinus infections, and even pneumonia. Prolonged exposure may also cause skin irritations, headaches, and other health concerns. Addressing mould promptly is essential to protect both your home’s aesthetics and your family’s well-being.
Prevention is equally important. Proper surface preparation, combined with high-quality mould-resistant paint, is key to eliminating mould and preventing its return. With Nippon Paint’s recommended coating system, you can create a healthier, cleaner, and more comfortable home environment.
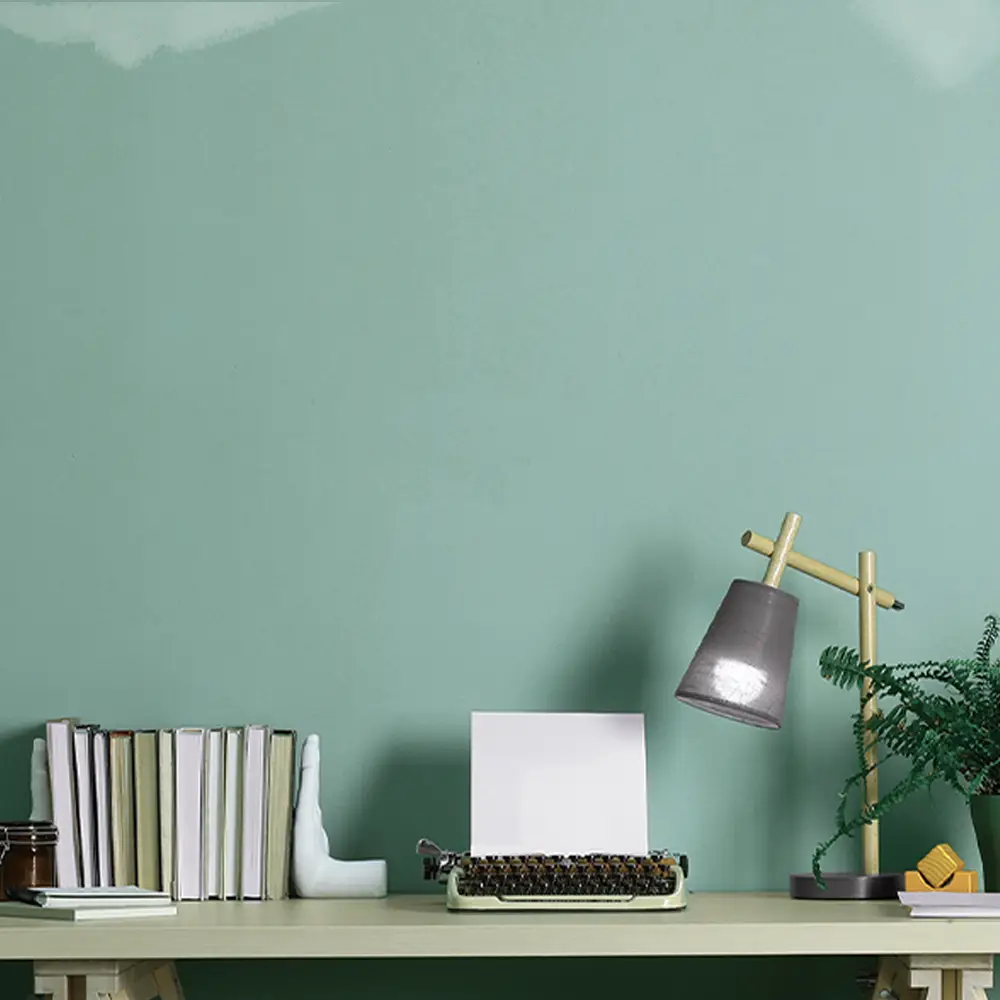
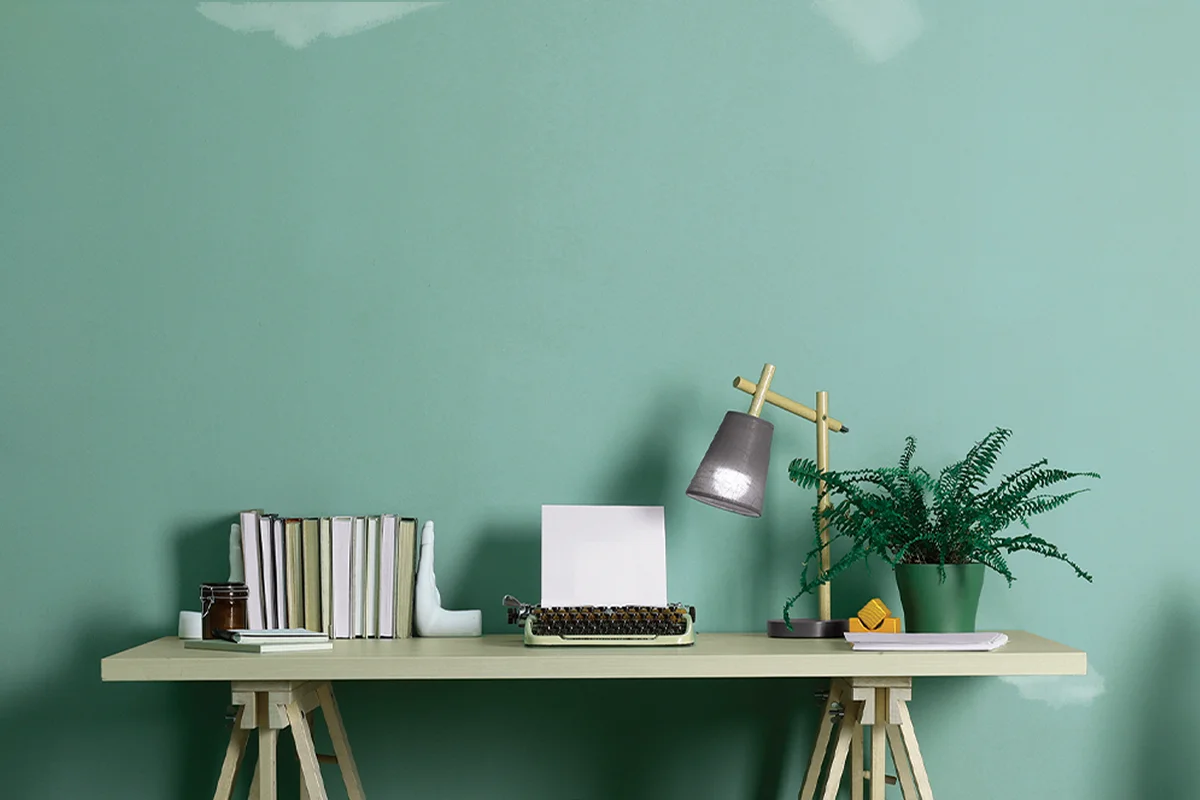
White Patches on Painted Walls: What Causes Them and How to Fix Them
Have you noticed unsightly white streaks or blotches on your painted walls, particularly in areas like bathrooms or kitchens with high humidity? These white patches are a common problem that can make your walls look old and poorly maintained.
In Malaysia, with its tropical climate and frequent moisture, this issue is even more prevalent. But don’t worry, in this article, we’ll uncover what causes these white patches, how to fix them, and the best practices to prevent them from coming back. Whether you’re dealing with a new home or refreshing older walls, these tips will help you maintain a clean and polished finish.
What is Surfactant Leaching?
Surfactant leaching occurs when certain ingredients in water-based paints, called surfactants, come to the surface of the paint film. Surfactants are essential in latex paints as they help the paint spread smoothly and retain its colour. However, in humid or damp environments, these surfactants can sometimes rise to the surface, leaving behind white or discoloured patches. While this issue doesn’t affect the paint’s structural integrity, it can compromise the appearance of your walls, especially when using darker colours, which are more prone to this issue due to their higher surfactant content.
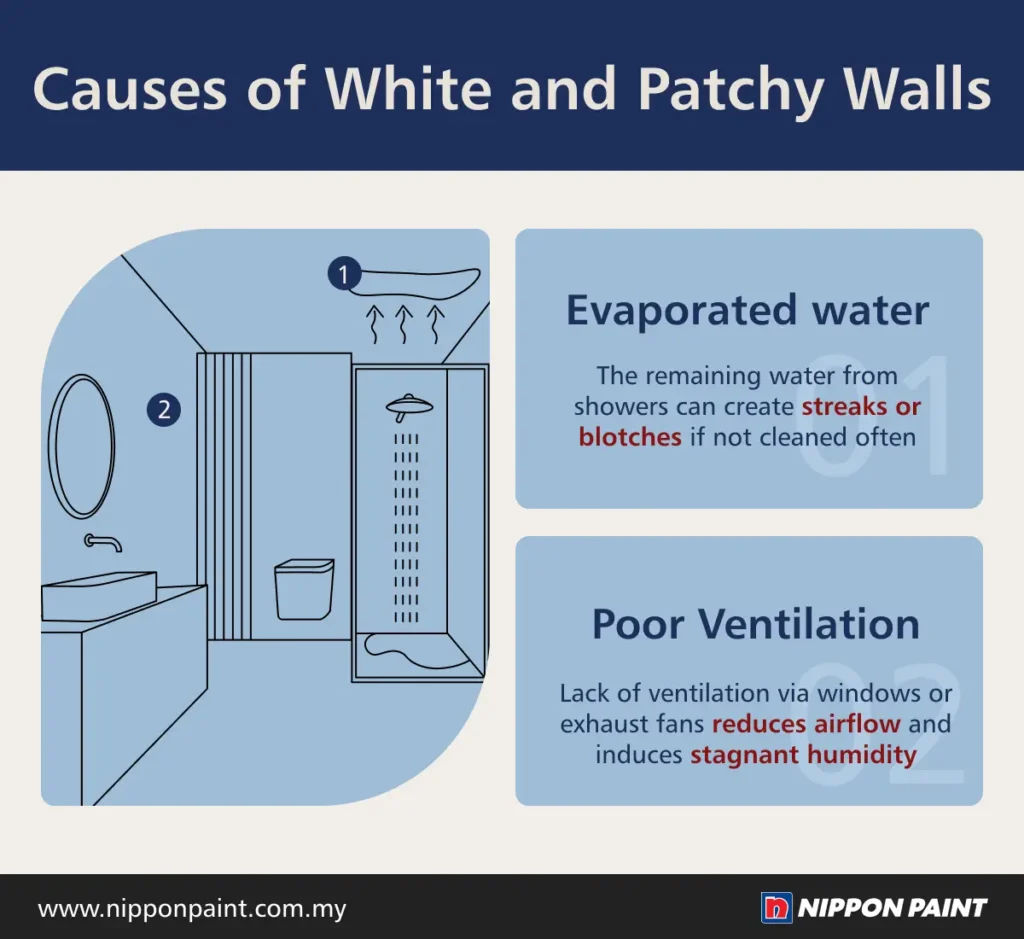
How Does It Happen?
Surfactant leaching is usually triggered by high moisture levels. For example, in bathrooms where steam from showers often accumulates, the moisture draws surfactants to the surface. Once the water evaporates, the surfactants remain, creating streaks or blotches. This issue is particularly noticeable on ceilings or walls painted with darker hues, as the contrast makes the leaching more visible.
In tropical climates like Malaysia, the combination of constant humidity and poor ventilation exacerbates this issue. Kitchens, laundry areas, and spaces without proper airflow are especially prone to surfactant leaching.
What to Do If You Notice White Patches
If you’re not planning to repaint right away, you can take these steps to address the issue:
Clean the Surface Gently wash the affected area with soap and water using a soft cloth. Rinse thoroughly and repeat until the surface looks clean. This process removes the surfactants from the surface. Repeat once or twice during this period. This is normal and part of the curing process.
Improve Ventilation To prevent further leaching, ensure the space is well-ventilated. Install an exhaust fan or open windows to improve airflow and reduce humidity levels in the room. This is particularly important for bathrooms, kitchens, and other moisture-prone areas.
Repaint Preparation: Fixing the Issue Permanently
If the white patches persist or you’re ready to repaint for a fresh look, proper preparation is key to preventing the issue from recurring. Follow these steps for the best results:
Clean the Surface Thoroughly Before repainting, clean the affected area to remove any remaining surfactants. Use soap and water, and ensure the wall is completely dry before moving on to the next step.
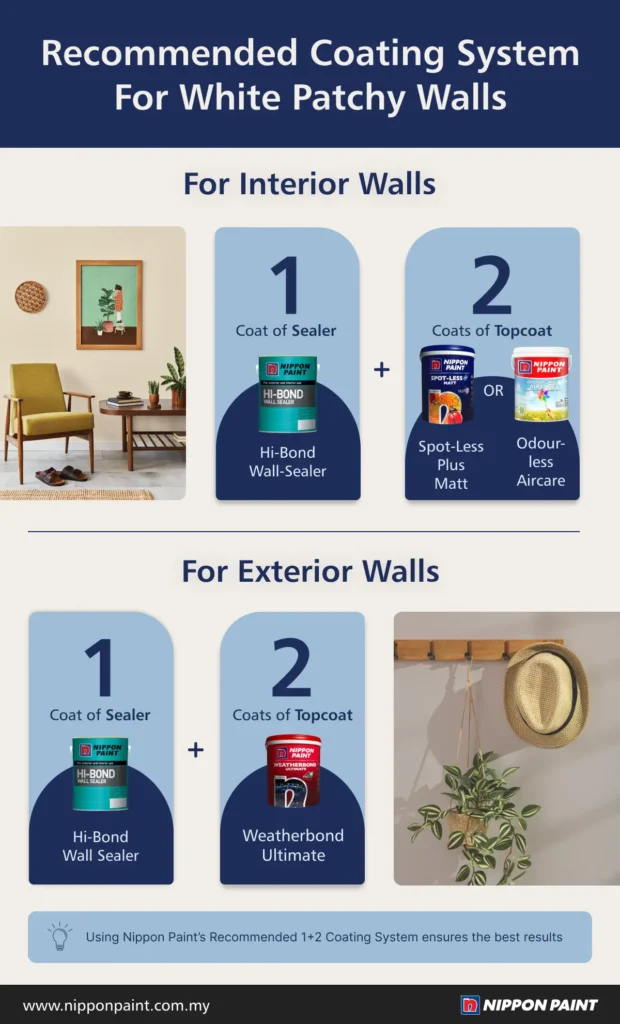
Apply a Sealer Start with one coat of Nippon Paint Hi-Bond Wall Sealer, which is specially designed to enhance intercoat bonding and create a strong base for the topcoat. This sealer also helps protect against moisture-related issues, ensuring the durability of your paint job.
Apply Two Coats of Topcoat For interior walls, apply two coats of Nippon Paint Odour-less AirCare for improved air quality, as it absorbs harmful formaldehyde, or opt for Nippon Paint Spot-less Plus, which offers enhanced stain resistance and effortless cleaning. Both topcoats ensure superior washability, vibrant, long-lasting colours, and a clean, fresh look for your indoor spaces.
For exterior walls, use two coats of Nippon Paint Weatherbond Ultimate, formulated with Quartz and Fibra Technology for excellent UV, rain, and dirt resistance. It provides up to 15 years of protection, keeping your walls vibrant and durable against harsh weather conditions.
Allow the first coat to dry completely before applying the second for a flawless and long-lasting finish.
Conclusion
Surfactant leaching, while common in high-humidity environments, is a manageable issue with the right approach. By understanding its causes and addressing it promptly, you can restore the appearance of your walls and prevent it from happening again. Nippon Paint’s trusted solutions, including the 1+2 coating system, one coat of sealer followed by two coats of topcoat, provide the durability and protection your walls need to withstand Malaysia’s tropical climate.
With proper ventilation, regular cleaning, and the use of high-quality paint products, you can maintain your walls’ pristine appearance and enjoy a home that looks fresh, vibrant, and inviting year-round. Say goodbye to white patches and hello to beautiful, long-lasting walls!
Selecting paint colours for your home doesn’t have to be overwhelming. By using the colour wheel and following a few basic design principles, you can create a space that is stylish, balanced, and uniquely yours. This guide will help you understand how to use the colour wheel to achieve beautiful combinations, followed by the popular 60-30-10 rule for applying colours in a room.
Understanding the Colour Wheel
The colour wheel is a tool that helps you see how colours relate to each other, making it easier to find combinations that work well together. Here are some popular ways to use the colour wheel to create a cohesive look in your space:
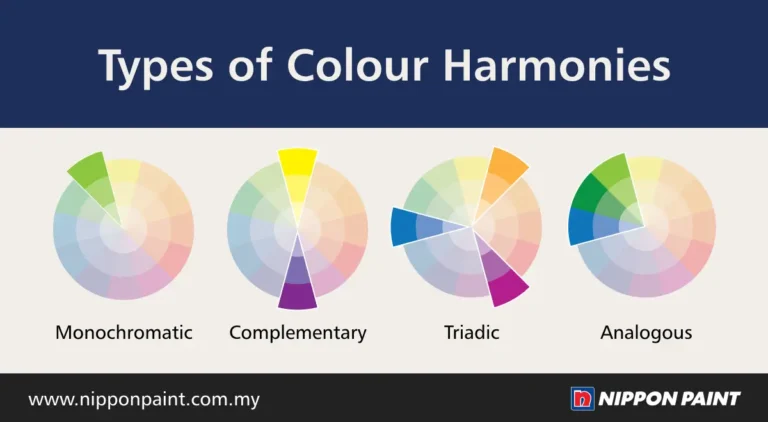
i) Monochromatic Scheme
A monochromatic colour scheme uses different shades, tints, and tones of a single colour. For example, if you choose blue as your base colour, you might use a deep navy for the main walls, a softer sky blue for trim or accents, and even lighter blue accessories like cushions or rugs. This approach creates a cohesive and calming atmosphere, making it ideal for bedrooms or relaxation areas.
ii) Complementary Scheme
Complementary colours are opposite each other on the colour wheel, such as blue and orange or purple and yellow. When used together, these colours create a bold, eye-catching contrast. For instance, if you have an orange accent wall, you can add blue cushions or artwork to add a pop of contrast. This scheme is great for adding energy and vibrancy to social spaces like living rooms or dining areas.
iii) Triadic Scheme
A triadic scheme uses three colours that are evenly spaced around the colour wheel, such as red, blue, and yellow. This combination creates a lively, balanced look. For example, in a child’s playroom, you might use a yellow wall, blue furniture, and red accents in toys or cushions. By keeping one colour dominant (like yellow on the walls) and using the other two more sparingly, you maintain harmony without overwhelming the space.
iv) Analogous Scheme
Analogous colours sit next to each other on the colour wheel, like blue, blue-green, and green. This scheme offers a harmonious, subtle look because the colours blend naturally. For example, in a bathroom, you could paint the walls a soft blue, add green towels, and use blue-green tiles. This combination feels calming and cohesive, making it ideal for spaces where you want a relaxing atmosphere.
Using the colour wheel in this way allows you to experiment with different styles and moods for each room. Whether you want a bold look with complementary colours or a peaceful vibe with an analogous scheme, the colour wheel can guide you in making choices that fit your taste.
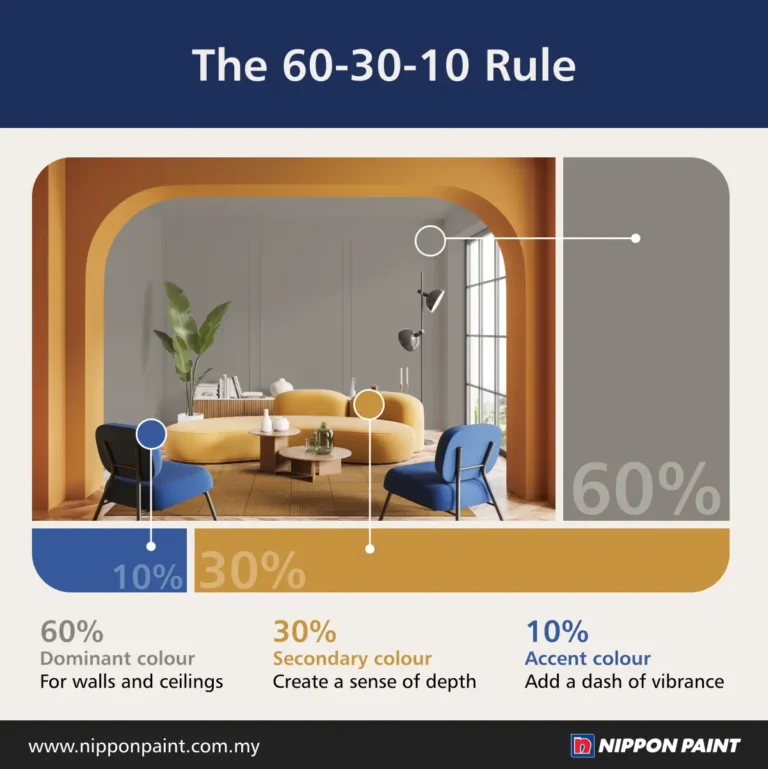
The 60-30-10 Colour Scheme Rule
Once you’ve chosen your colours, the 60-30-10 rule can help you apply them in a balanced way throughout your room. This rule involves dividing your colours into three main proportions: 60% for the main colour, 30% for the secondary colour, and 10% for the accent colour. This method creates a visually pleasing look without overwhelming the space.
How It Works:
i) 60% Main Colour
This is the dominant colour that covers most of the room. It’s typically used on large surfaces like walls and ceilings. For example, in a living room, you might choose a soft grey or cream for the walls, which makes up about 60% of the room. This colour sets the overall tone and provides a neutral backdrop for other colours.
ii) 30% Secondary Colour
The secondary colour adds depth and is usually applied to medium-sized elements like furniture, curtains, or rugs. In the same living room, you might have a deep blue sofa and blue-grey curtains that cover about 30% of the visual space. This secondary colour complements the main colour, adding interest and balance without overpowering the room.
iii) 10% Accent Colour
The accent colour is the final touch, adding a pop of contrast in smaller decor pieces like cushions, artwork, or vases. In the living room example, you might choose a vibrant yellow or orange for cushions and decorative items. This 10% accent creates focal points, adding warmth and personality to the space.
Tips for Using the 60-30-10 Rule
Stick to Three Colours Limiting your palette to three main colours keeps the room cohesive and prevents it from looking too busy.
Adjust for Personal Preference You can modify the proportions based on your taste. For instance, you could try 70% for the main colour, 20% for the secondary colour, and 10% for the accent. For a darker look, consider 60% dark, 30% medium, and 10% light.
Coordinate with Existing Decor Think about the colours of your furniture and accessories when choosing your 60-30-10 colours to ensure harmony throughout the room.
Use the Colour Wheel as a Guide The colour wheel can help you pick complementary or analogous colours to use within the 60-30-10 framework, allowing you to achieve a cohesive look.
By using the colour wheel to choose complementary or harmonious schemes and applying the 60-30-10 rule to balance them, you can transform any space into a beautifully styled room. Whether you’re aiming for a serene monochromatic scheme or a lively triadic look, these tools will help you create a space that feels polished and inviting. Now you’re ready to take on your home design with confidence, using colour as your guide.
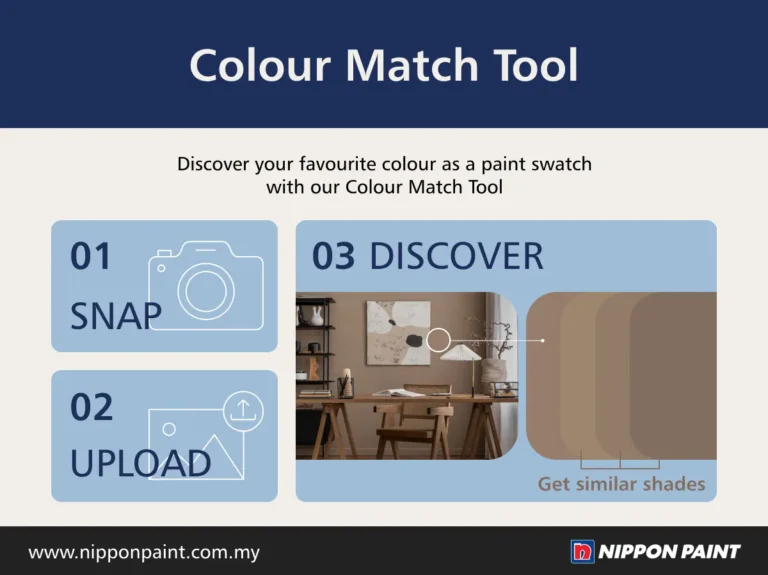
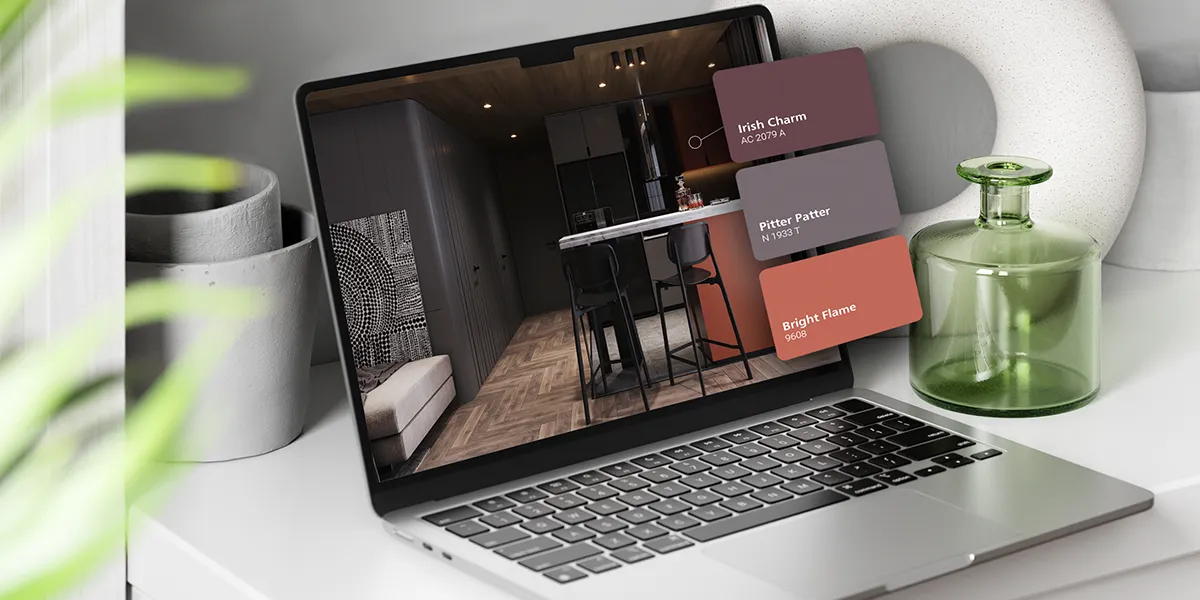
See a colour you like in real life?
Snap, upload, and Colour Match! Take a picture and upload it to our Colour Match tool to identify the closest Nippon Paint colour that it matches.
A Beginner’s Guide to Painting Your Exterior Walls
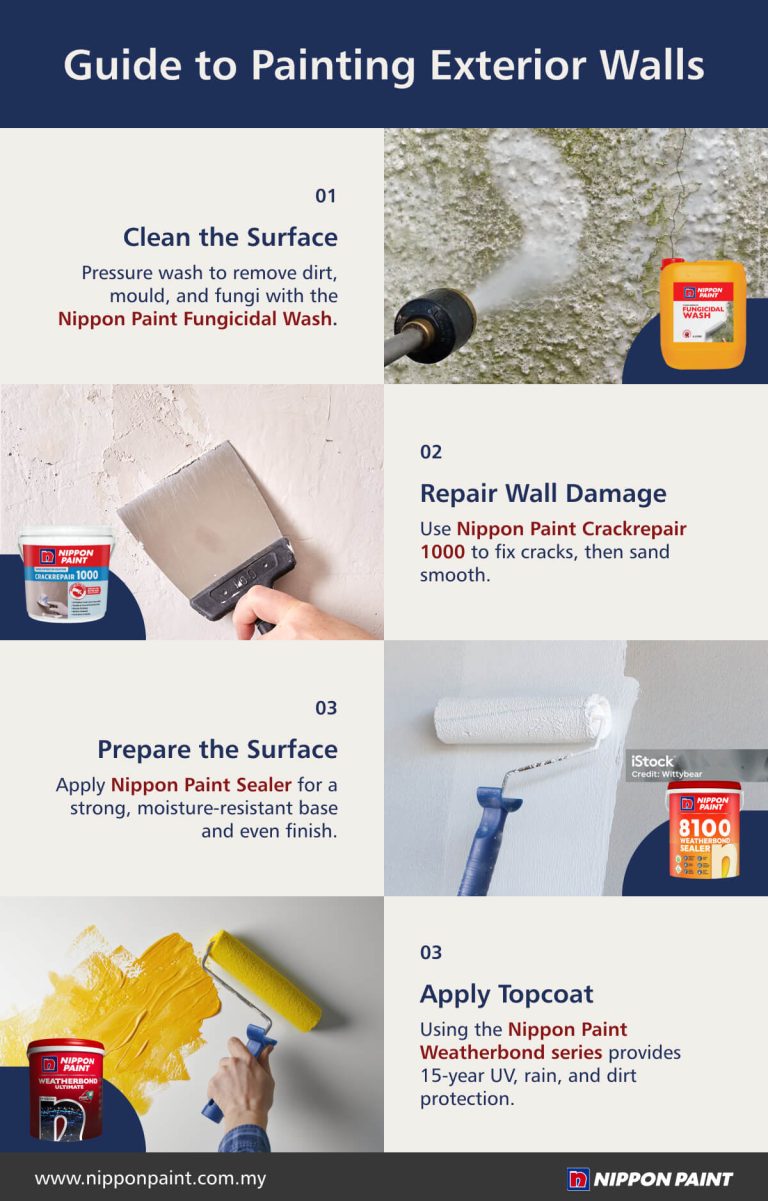
In Malaysia, the tropical climate presents unique challenges for exterior painting. With high humidity, intense sunshine, and frequent rain, many homeowners experience issues like staining and colour fading within just a few years. This rapid deterioration underscores the importance of choosing the right paint and following the proper painting techniques. This guide will walk you through the essential steps for painting your exterior walls, focusing on the benefits of using Nippon Paint products designed to withstand Malaysia’s harsh weather conditions. Let’s explore how to protect and beautify your home’s exterior.
i) Clean the Wall Surface
Preparing your wall by cleaning it thoroughly is vital to achieving an even, long-lasting finish. A clean surface ensures that the paint adheres properly, resulting in a smooth, durable finish that withstands the elements over time.
Use a pressure washer or hose with a cleaning solution, such as Nippon Paint Fungicidal Wash, to remove any dirt, mould, and fungal growth. This step is essential in Malaysia’s humid climate, where mould and mildew can develop quickly. After washing, allow the wall to dry completely for at least 24 hours before moving on to the next steps. This drying period ensures that the paint will adhere effectively, giving you a strong, lasting coat.
ii) Repair Existing Damage on the Wall
To make sure your wall is smooth and ready for painting, start by fixing any cracks or damaged areas. First, gently open up the cracks a little using a chisel or hammer. This helps to remove any loose material and gives the filler something to hold onto. Think of it as making a small, shallow line along the crack so that the filler can settle in securely.
Next, use a wire brush or scraper to clear away any peeling paint, dust, or debris. This will help ensure a strong bond between the wall and the repair materials. Then, apply Nippon Paint Crackrepair 1000 with a putty knife. This ready-to-use crack filler is ideal for repairing medium cracks, tiny holes, and imperfections on plaster, cement render, and painted surfaces. It offers excellent workability, good adhesion, and resistance to weather and alkalinity, making it a reliable choice for both interior and exterior walls.
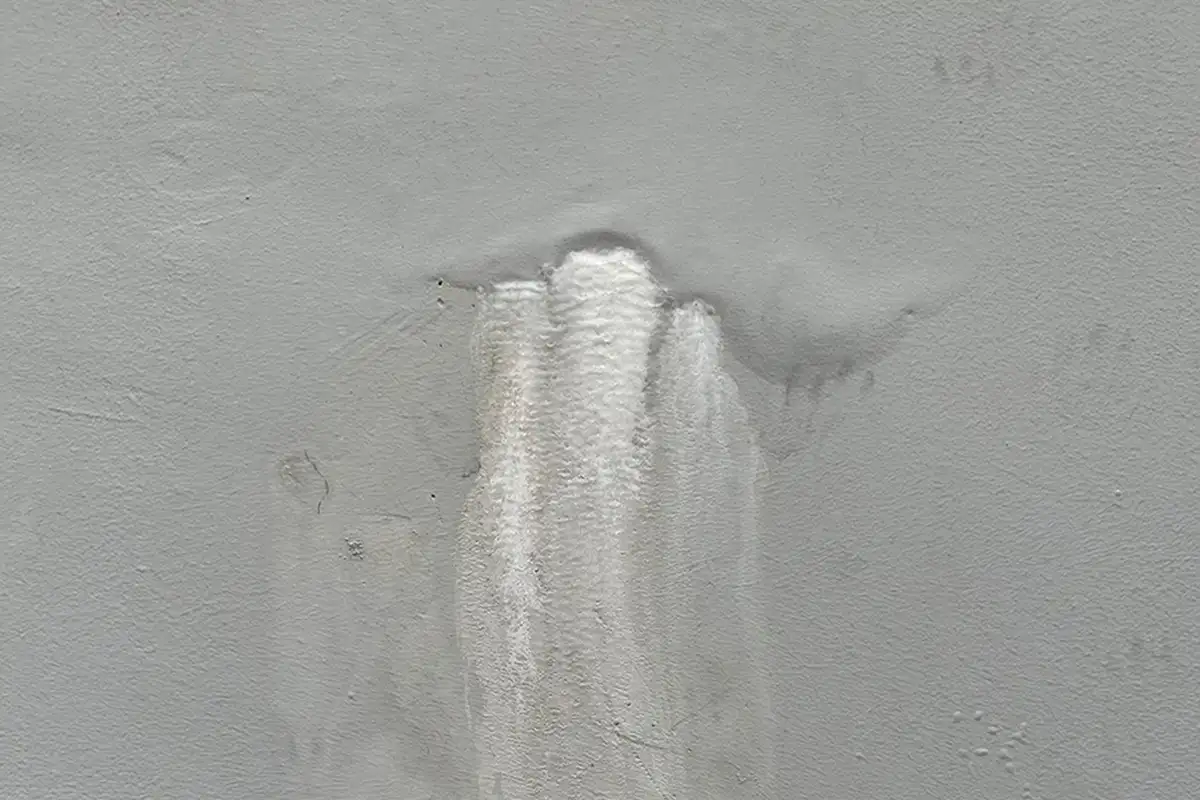
Also, look for areas where cement may have eroded or crumbled around windows or other edges. These “cement drop-offs” can leave holes that should be filled in to prevent water from seeping in. Once all repairs are made, allow the filler to dry fully before gently sanding the area to create a seamless, smooth surface.
iii) Prepare the Wall Surface for Paint
Applying a sealer to your exterior wall is an essential step for long-lasting results. A Nippon Paint Sealer is particularly effective on surfaces that are porous, chalky, or prone to moisture issues, like bare drywall, plaster, or masonry. A sealer prevents the wall from absorbing too much paint, which can lead to uneven finishes, and it provides a barrier against moisture, it is crucial for homes in Malaysia’s humid climate. By applying a sealer, you create a strong foundation for the top coat, enhancing its adhesion and durability.
For more information on the difference between sealer paint and primer paint, you can read the article here.
iv) Apply the Top Coat
Now, you’re ready to paint! Choosing high-quality exterior paint, such as the Nippon Paint Weatherbond® Series, is essential for enduring Malaysia’s challenging climate. Formulated with advanced Quartz and Fibra Technology, the Weatherbond® Series provides a tough and durable paint film that resists UV radiation, rain, and dirt. This ensures superior protection against peeling, mould growth, and colour fading, keeping your walls vibrant and fresh for up to 15 years.
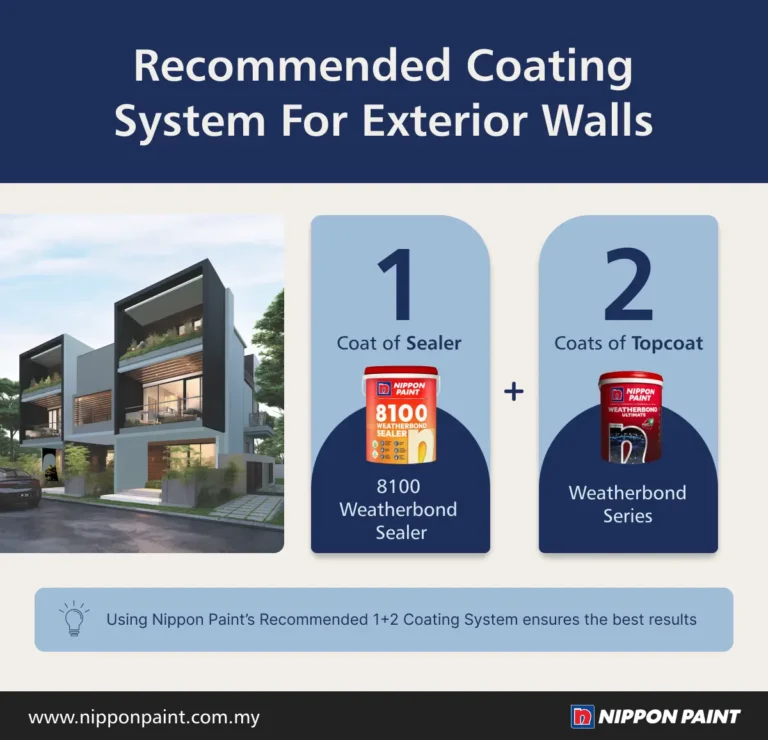
In addition, Nippon Paint recommends a 1+2 coating system for maximum durability. This involves applying one layer of sealer to create a strong foundation, followed by two layers of topcoat for added thickness and resilience. This system enhances the paint’s resistance to humidity, rain, and UV rays, ensuring a long-lasting, protective finish that maintains your home’s aesthetic appeal over time.
Painting your exterior walls in Malaysia requires careful preparation and the right products to withstand the region’s demanding weather. By following these few steps, cleaning, repairing, sealing, and applying a high-quality top coat, you can achieve a beautiful, long-lasting finish that will protect your home for years.
Investing in quality materials, like Nippon Paint’s Weatherbond® Series, and taking the time to prepare properly will not only enhance your home’s curb appeal but also prevent damage from elements like mould, mildew, and UV rays. With a thoughtful approach, you can transform and protect your home, keeping it vibrant and fresh for years to come.
Conclusion
Investing in quality materials, like Nippon Paint’s Weatherbond® Series, and taking the time to prepare properly will not only enhance your home’s curb appeal but also prevent damage from elements like mould, mildew, and UV rays. With a thoughtful approach, you can transform and protect your home, keeping it vibrant and fresh for years to come.
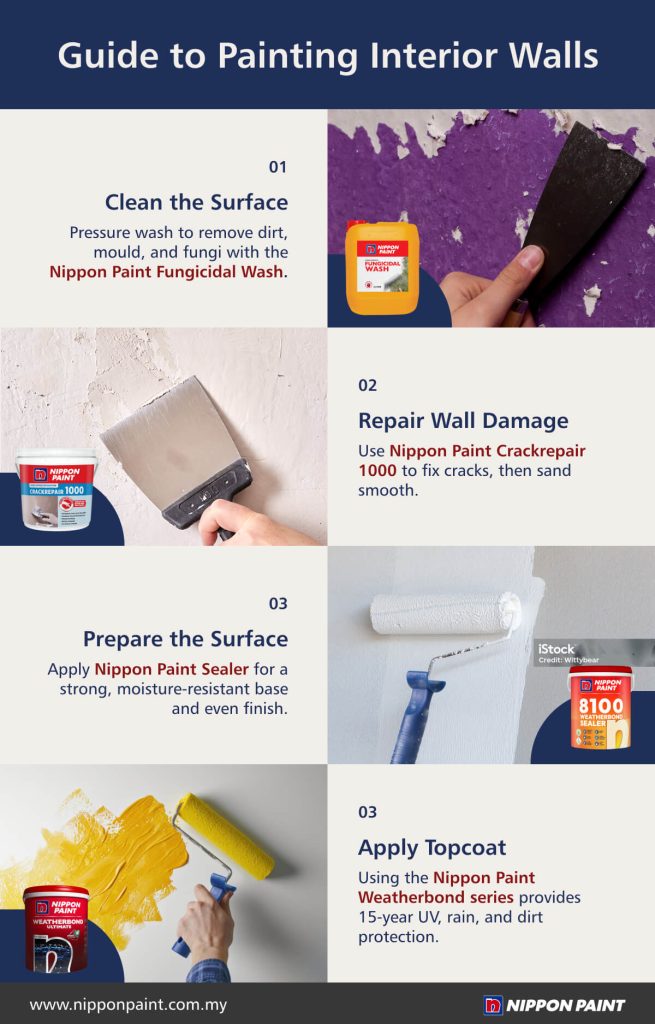
Ready to refresh your space with a DIY paint project? Painting interior walls is more than just picking a colour, it requires careful planning and preparation. In this guide, we’ll walk you through the essential steps, from gathering tools and prepping surfaces to selecting the right colours and finishes for your home. By following these tips, you’ll achieve a professional-quality finish that complements your style and lasts for years. Whether you’re a beginner or an experienced DIYer, this guide will walk you through each step, from prepping the walls to choosing the perfect paint, so you can achieve a long-lasting, beautiful result.
i) Remove Damaged or Old Paint
A good paint job starts with removing any old, flaky paint. Skipping this step may lead to peeling later. For best results, smooth the surface with Nippon Paint Abrasive Waterproof Sandpaper, allowing the new paint to grip the wall firmly.
ii) Clean Your Painting Surface
Dust, cobwebs, and dirt can interfere with paint adhesion, so a thorough cleaning is a must. Start by wiping down the wall with a damp cloth and mild detergent, then go over it with clean water and a soft towel. If you spot any mould, use Nippon Paint Fungicidal Wash to keep it under control.
iii) Repair Damaged Surfaces
After removing old paint, you might find holes and cracks in the wall. Use a tool to deepen these areas to remove loose particles slightly, then fill them with fresh filler. Once dry, sand down the area for a smooth, even surface before applying your sealer.
iv) Cover Up Before You Start Painting
Before you start painting, use painter’s tape to mask off any areas that need protection around windows, door frames, and trims. Covering these spots helps avoid accidental drips and keeps your project tidy. Make sure to tape over outlets and other fixtures as well.
v) Choose Your Paint
Selecting the right interior topcoat paint is essential for a lasting, beautiful finish. Nippon Paint offers high-quality options with numerous benefits, including long-lasting colour, resistance to peeling and flaking, anti-fungal properties, odour-resistant, and anti-bacteria formulas. One standout choice is Nippon Paint Odour-less AirCare. This innovative formula delivers best-in-class performance, featuring superior hiding power for exceptional coverage, allowing you to achieve richer, more vibrant colours in fewer coats. Its smooth finish and minimal spatter during application ensure a professional look while improving indoor air quality by absorbing harmful formaldehyde, creating a healthier living environment.
vi) Practise the Nippon Paint 1+2 Coating System
For a professional finish, Nippon Paint’s recommended coating system involves applying one layer of sealer to create a solid foundation. Once the sealer is completely dry, follow with two layers of topcoat. This 1+2 coating system adds thickness and durability, ensuring a long-lasting and flawless result.
Tips:
Paint in well-lit conditions to help spot any missed spots or mistakes.
Opt for Nippon Paint products with advanced features like low volatile organic compounds (VOCs), anti-fungal, or high durability for added benefits.
If you plan to paint the ceiling, tackle it first to avoid drips onto fresh walls.
With the right preparation and a thoughtful approach, you can achieve a beautiful transformation for your interior walls that truly reflects your unique style. Gather your tools, unleash your creativity, and enjoy every step of bringing your vision to life. Your freshly painted walls will not only elevate the look of your space but also give you a sense of pride in your DIY accomplishment.
Conclusion
With the right preparation and a thoughtful approach, you can achieve a beautiful transformation for your interior walls that truly reflects your unique style. Gather your tools, unleash your creativity, and enjoy every step of bringing your vision to life. Your freshly painted walls will not only elevate the look of your space but also give you a sense of pride in your DIY accomplishment.
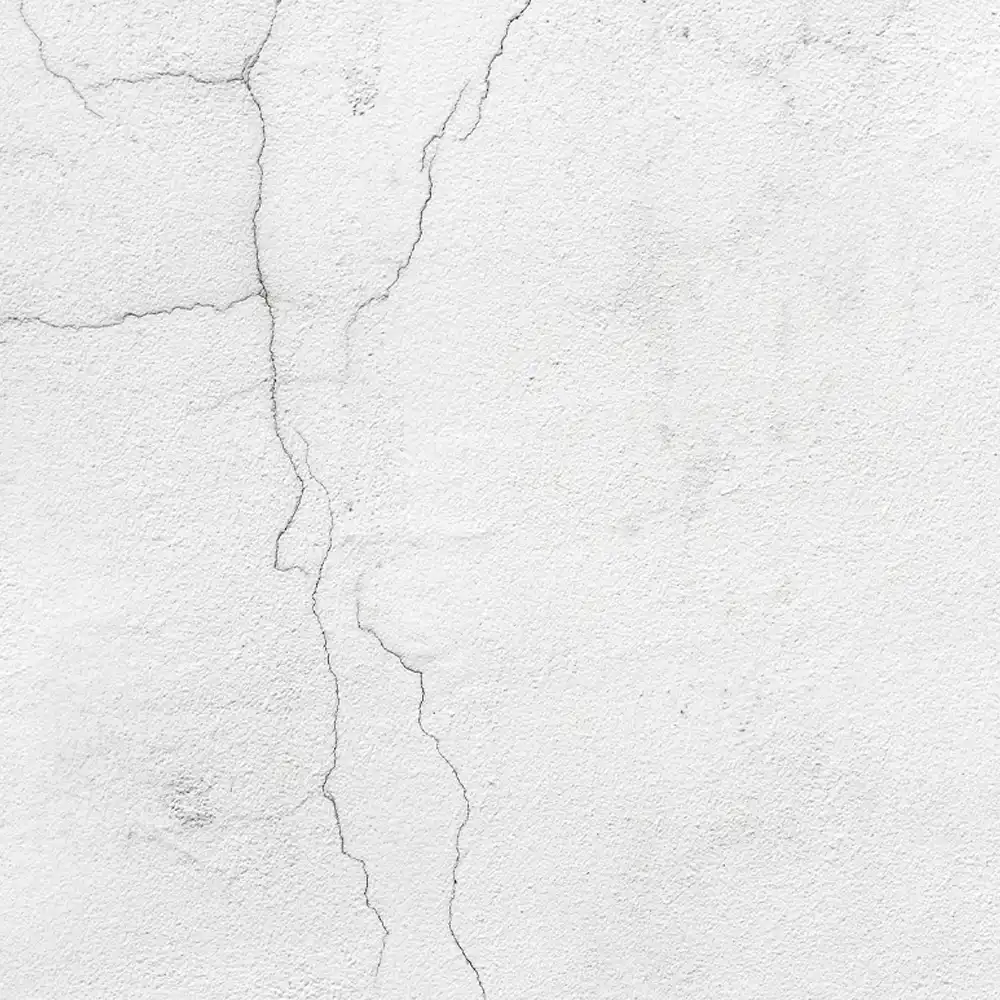
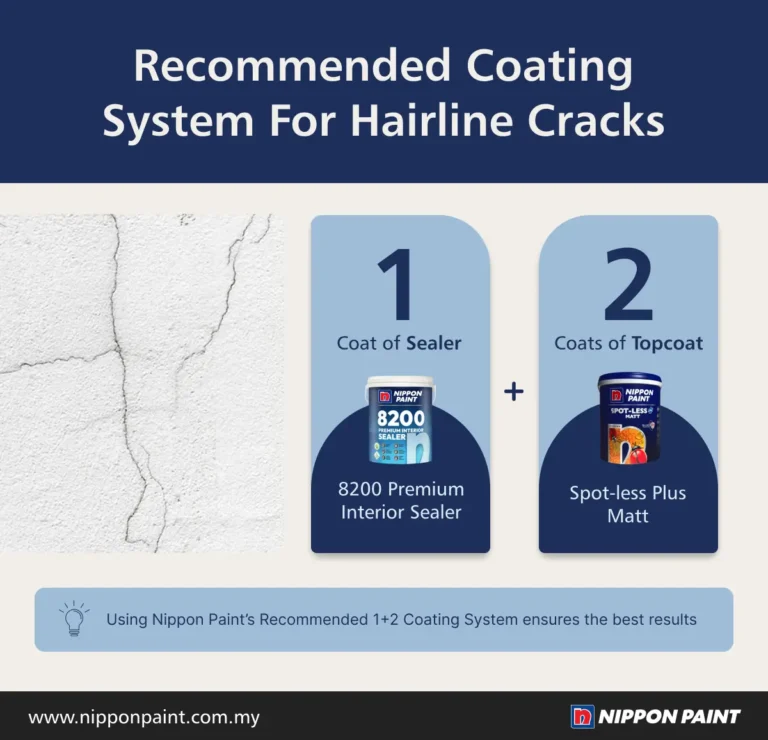
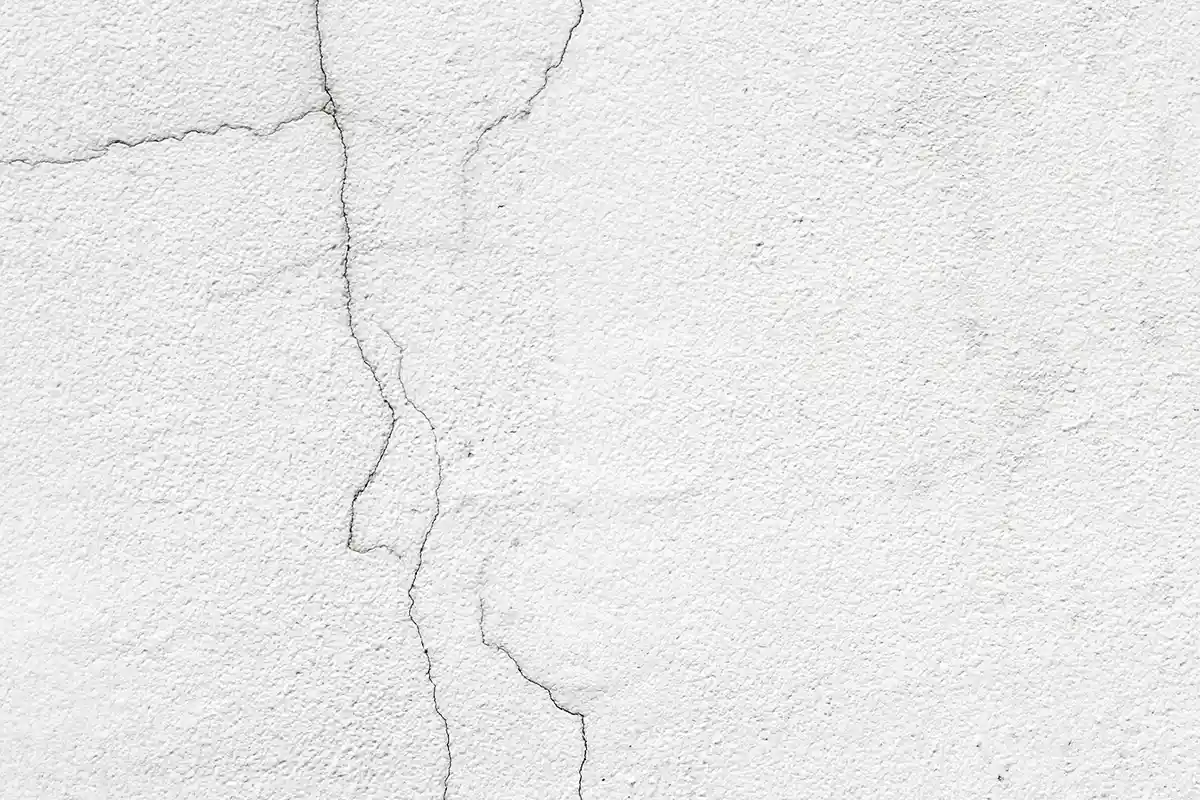
Hairline cracks are a common issue in both new and old homes, often appearing near windows and doors due to pressure and movement. These small cracks, usually no wider than 0.5 mm, can worsen if left unaddressed.
Water can seep into these cracks, causing paint to peel and encouraging mould or mildew growth, which affects your home’s appearance and the longevity of your paintwork. Let’s explore the reasons behind hairline cracks, how to fix them effectively, and how Nippon Paint’s recommended coating system can help you achieve a durable, long-lasting finish.
Reasons for Hairline Cracks on Walls
1. Contraction and Expansion
In Malaysia’s humid climate, fluctuations in temperature and moisture levels cause materials like paint, plaster, and concrete to naturally expand and contract. Over time, this movement weakens the structural integrity of the surface, resulting in hairline cracks. This is particularly common in areas exposed to direct sunlight, such as exterior walls, or places with significant temperature differences between day and night.
2. Temperature Differences Between Interior and Exterior Walls
The difference in temperature and environment between the inside and outside of a building can also contribute to cracks. For instance, the cooler indoor environment may cause the wall to contract, while exposure to heat and humidity outside causes it to expand. This stretching and shrinking of the plaster surface can result in hairline cracks.
3. Use of Lightweight Bricks
Hairline cracks are often observed in walls made with lightweight bricks. This is because lightweight bricks contain a higher number of internal pores compared to traditional bricks, which causes them to expand and contract more. The plaster layer applied to these bricks is subjected to additional stress, leading to cracks over time.
How to Fix Wall Cracks with Paint
Before applying paint to fix hairline cracks, it’s essential to prepare the area properly for long-lasting results. Follow these steps for effective repairs:
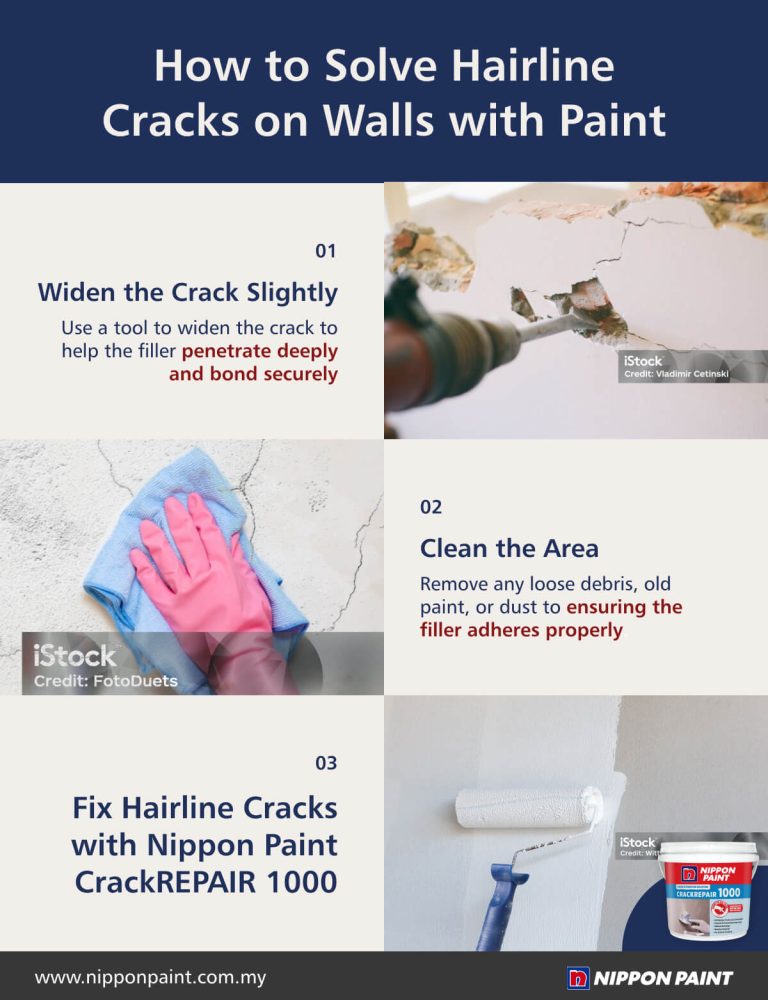
Step 1 : Widen the Crack Slightly
Use a screwdriver or utility knife to carefully scrape along the crack, creating a narrow V-shape. This step helps the filler penetrate deeply and bond securely, ensuring a strong repair.
Step 2 : Clean the Area
Remove any loose debris, old paint, or dust using a dry brush, vacuum, or cloth. A clean surface is key to ensuring the filler adheres properly.
How to Fix Hairline Cracks with Nippon Paint Products
Let’s break down the steps for addressing hairline cracks, tailored for both exterior and interior walls. Nippon Paint’s recommended coating system, known as the 1+2 coating system, ensures the best results. This involves starting with one layer of sealer to prepare the surface, followed by two layers of topcoat for enhanced durability and a strong, protective barrier. Continue reading as we guide you step by step on how to fix these cracks effectively.
Fixing Cracks on Exterior Walls
Step 1: Prepare the Surface
Start by cleaning the crack thoroughly to remove any dirt or debris. For stubborn stains, use a pressure washer. Let the surface dry completely before proceeding.
Step 2 : Fill the Crack
Apply Nippon Paint CrackREPAIR 1000, a ready-to-use crack filler specially formulated to repair and restore cracks, tiny holes, and imperfections on various surfaces. Use a putty knife to press the material into the crack until it is smooth and level with the wall. This product provides excellent adhesion and durability, making it ideal for both interior and exterior surfaces.
Apply one layer of Nippon Paint 8100 Weatherbond Sealer. This sealer offers excellent resistance against efflorescence and alkalinity, ensuring a strong foundation for the topcoat. It also enhances adhesion, promotes richer colour appearance, and is suitable for both new walls and repainting projects.
Step 5 : Paint with Topcoat
Finish with two coats of Nippon Paint Weatherbond Ultimate. This premium exterior paint is specially formulated for Malaysia’s challenging climate, providing excellent resistance against UV rays, rain, and dirt. With advanced Quartz and Fibra Technologies, it delivers enhanced durability, a tough paint film, and long-lasting colour protection. Allow the first coat to dry completely before applying the second coat for the best results.
Fixing Cracks on Interior Walls
Step 1 : Prepare the Surface
Remove any loose particles or dirt from the crack using a brush or cloth. Ensure the wall is dry before proceeding.
Step 2 : Fill the Crack
Apply Nippon Paint CrackREPAIR 1000, a ready-to-use crack filler specially formulated to repair and restore cracks, tiny holes, and imperfections on various surfaces. Use a putty knife to press the material into the crack until it is smooth and level with the wall. This product provides excellent adhesion and durability, making it ideal for both interior and exterior surfaces.
Use one layer of Nippon Paint 8200 Premium Interior Sealer, formulated to provide excellent adhesion and a luxuriously smooth finish. This sealer enhances the bonding between the surface and the topcoat, while also offering superior resistance to alkaline and moisture. It creates a strong foundation for the topcoat, ensuring a durable and flawless result.
Step 5 : Paint with Topcoat
Finish with two coats of Nippon Paint Spot-less Plus. This topcoat provides a smooth, vibrant finish and resists stains, making it easy to maintain in high-traffic areas. It also improves indoor air quality and offers lasting protection, ensuring your walls stay fresh and clean.
Conclusion
Addressing hairline cracks promptly is crucial to maintaining your walls’ beauty and structural integrity. Whether it’s exterior walls exposed to harsh weather or interior walls with small imperfections, using Nippon Paint’s solutions and following the right steps ensures effective repairs and a flawless, long-lasting finish. Proper preparation and painting now will save time and effort later, leaving you with smooth, beautiful walls that enhance your home’s appeal.
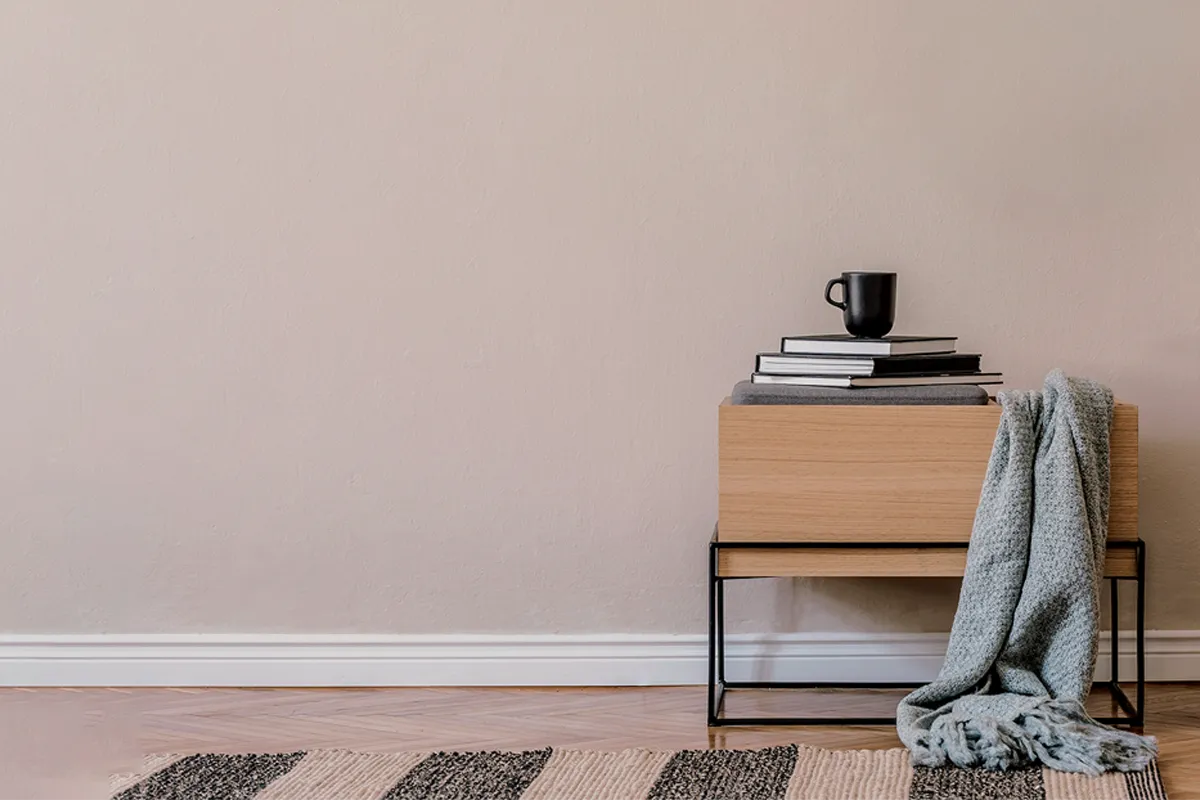
What Causes Chalky and Powdery Wall Surfaces and How to Prevent Them
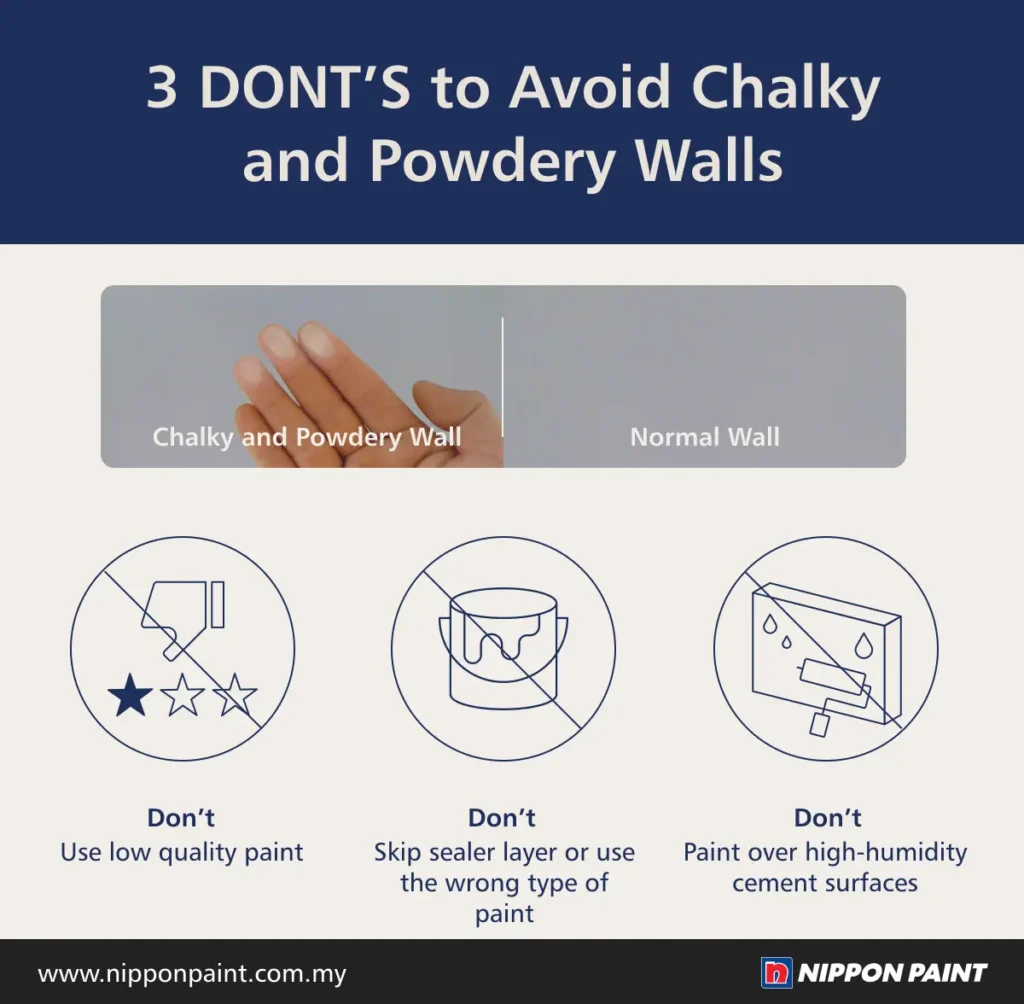
Have you ever noticed a fine, chalk-like powder rubbing off your painted walls when you touch them? This issue, commonly referred to as a powdery or chalky surface, often occurs with older walls or paint that has been exposed to harsh weather or high humidity for an extended period.
It is more commonly seen on exterior walls but can also affect interior walls in spaces with poor ventilation or moisture problems. This condition is often accompanied by fading, leaving your walls looking dull and poorly maintained.
Causes of Powdery Surfaces on Walls
Powdery wall surfaces can occur for several reasons, and understanding these causes is the first step toward effective prevention and repair:
1. Use of Low-Quality Paint
Low-quality paint often lacks sufficient adhesive or “glue” content to bind the paint film properly. Over time, exposure to sunlight, rain, and humidity can cause the paint’s adhesive properties to break down, leaving behind a chalky residue.
2. Skipping the Primer or Using the Wrong Type of Paint
Primer is essential for ensuring paint adheres properly to the surface. Skipping primer or using interior paint on exterior walls can result in premature deterioration. Interior paint is not formulated to withstand outdoor weather conditions and can break down when exposed to sunlight and rain.
3. Painting Over High-Humidity Cement Surfaces
Moisture trapped in cement walls can seep into the paint film after application. This moisture reacts with the paint, breaking down its adhesive properties and causing a powdery or chalky surface. High humidity is a common challenge in Malaysia’s tropical climate.
Powdery Surfaces vs Efflorescence: What’s the Difference?
Powdery surfaces and efflorescence can look similar but have distinct causes and solutions. Here’s how to tell them apart:
In summary, powdery surfaces are caused by paint deterioration, while efflorescence is a result of salt deposits from moisture movement within the wall.
How to Fix and Prevent Powdery Wall Surfaces
Proper preparation and the use of high-quality products are key to restoring and protecting both interior and exterior walls from powdery surfaces. Follow these steps using our recommended coating system to achieve long-lasting results.
Step 1 : Surface Preparation
Start by thoroughly cleaning the affected walls. For exterior walls, use a high-pressure water jet to wash off all powdery residue, dirt, and dust. For interior walls, wipe the surface with a damp cloth or scrub gently with a soft brush to remove loose material. In both cases, allow the surface to dry completely to prevent moisture from being trapped, which can lead to future issues. Ensure the wall is fully dry before proceeding to avoid moisture being trapped beneath the new paint.
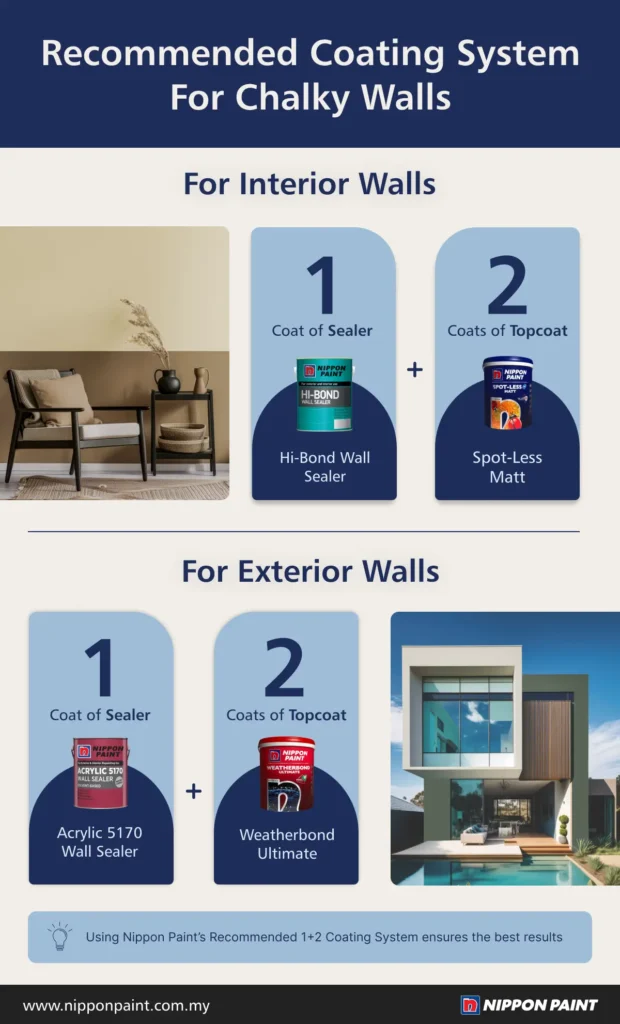
Step 2 : Apply a Sealer
Once the surface is clean and dry, apply a sealer suitable for the wall type:
For Exterior Walls Use Nippon Paint Acrylic 5170 Wall Sealer, specially designed for skim-coated surfaces, plaster ceilings, and old painted walls that are powdery in nature. It enhances inter-coat bonding and provides excellent protection against chalking and weather-related wear.
For Interior Walls: Nippon Paint Hi-Bond Wall Sealer, which improves inter-coat bonding and ensures a smooth, durable base for the topcoat.
It is specifically formulated for powdery interior wall surfaces. The sealer creates a strong foundation, ensuring that the topcoat adheres effectively and resists future chalking.
Step 3 : Apply Two Coats of Topcoat
After the sealer has dried, apply two layers of high-quality topcoat to complete the 1+2 coating system:
For Exterior Walls Use Nippon Paint Weatherbond Ultimate, which is formulated with advanced Quartz and Fibra Technology for superior durability. These technologies create a tough and resilient paint film that provides excellent protection against UV radiation, rain, and dirt, ensuring your walls remain vibrant and beautiful. With up to 15 years of protection, Weatherbond Ultimate is ideal for Malaysia’s harsh weather conditions, keeping your exterior walls looking fresh and long-lasting.
For Interior Walls Use Nippon Paint Spotless Plus, which provides a smooth, washable finish with anti-stain and anti-bacterial properties. It is perfect for high-traffic areas like living rooms, bedrooms, and kitchens, ensuring a clean and beautiful appearance. Ensure the first coat is completely dry before applying the second for maximum effectiveness and durability.
Conclusion
In Malaysia’s humid climate, where moisture and harsh weather constantly challenge wall surfaces, investing in the right products and proper preparation is essential. Nippon Paint’s 1+2 coating system involves applying one coat of sealer to create a strong base that protects against moisture and ensures proper adhesion, followed by two coats of topcoat for added durability and a flawless finish. This proven system helps you achieve walls that are smooth, durable, and free from powdery residue, enhancing both the aesthetics and longevity of your home.
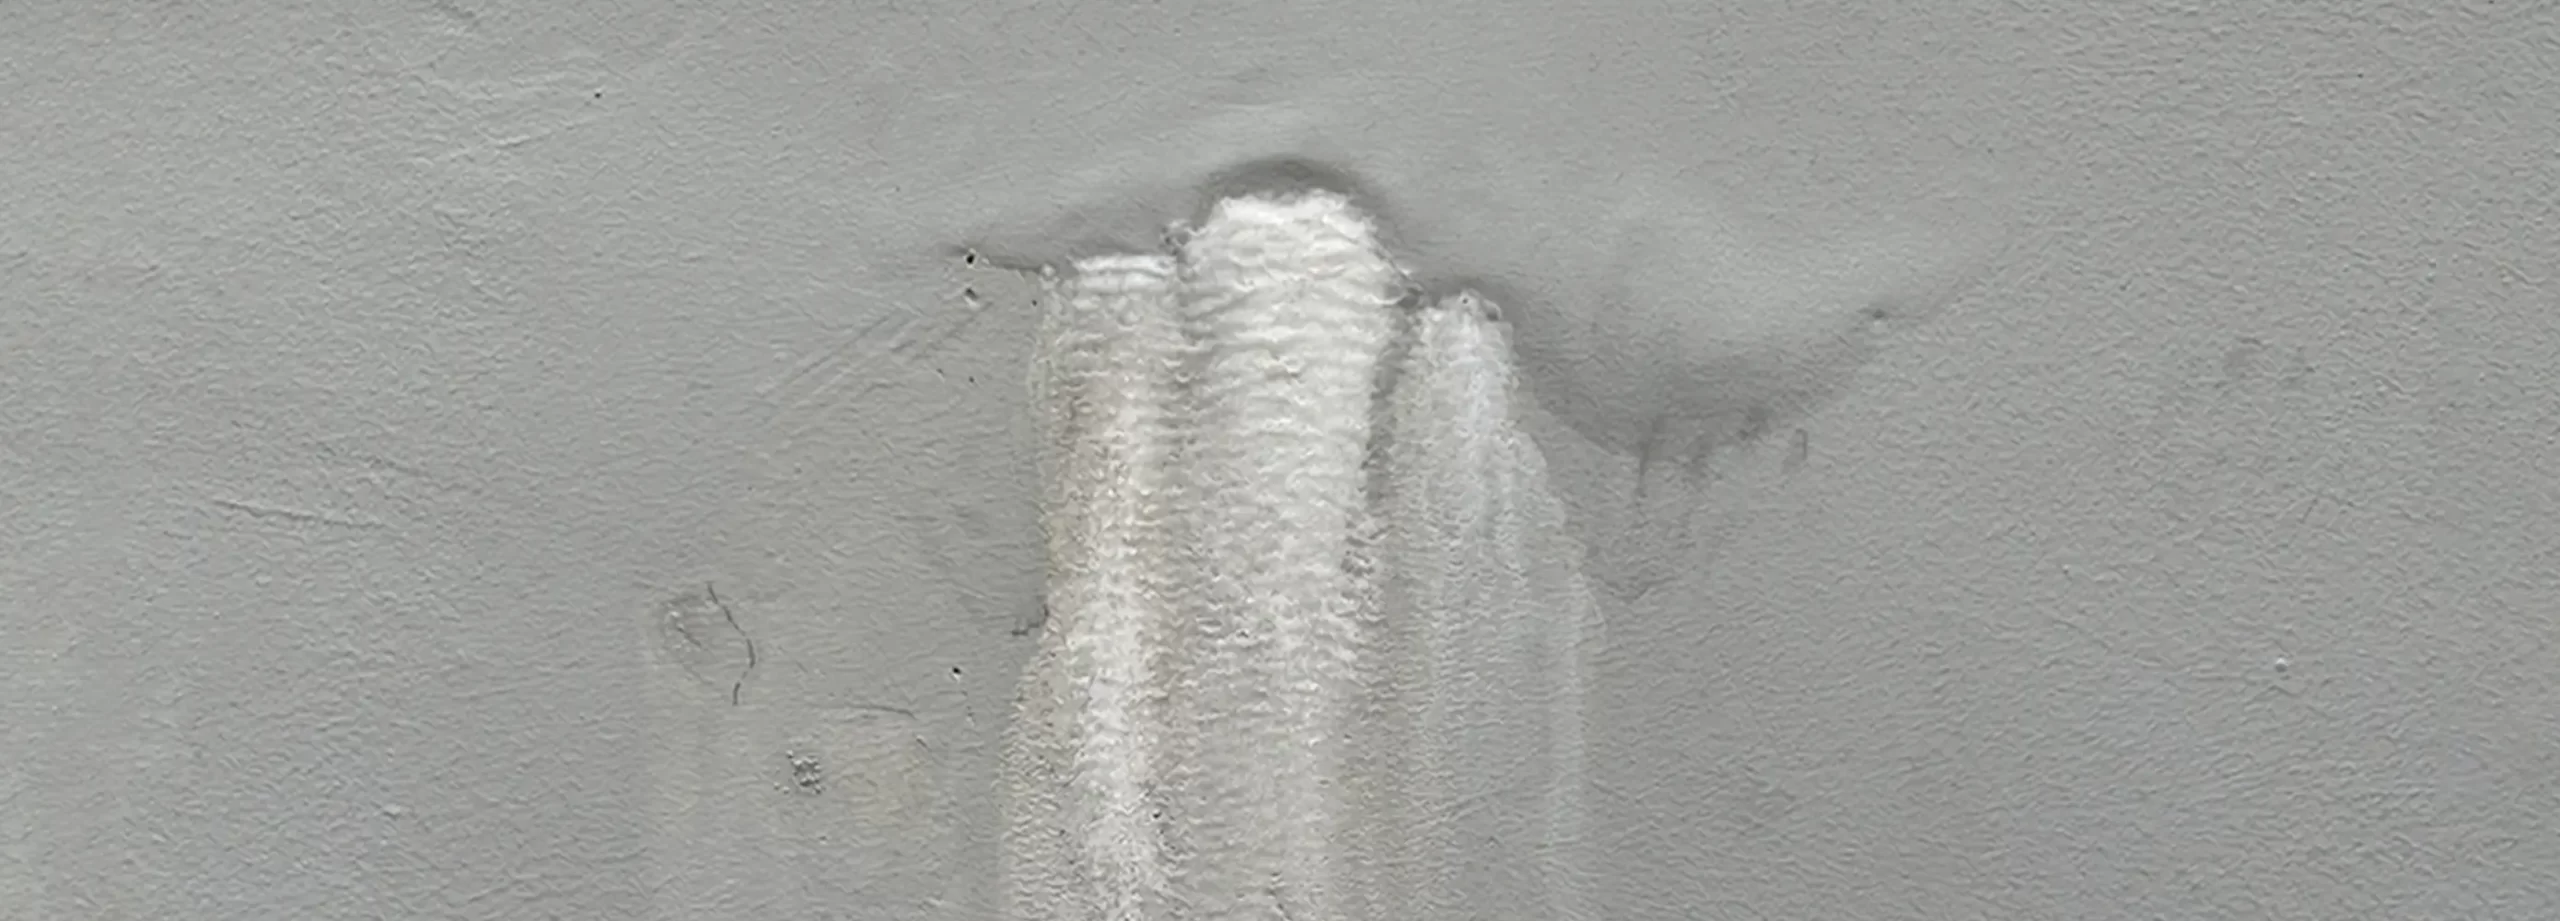
Efflorescence is a common issue faced by many homeowners, especially in Malaysia’s humid and rainy climate. It appears as a whitish or greyish deposit on walls, often leaving your home looking aged and poorly maintained. But what exactly is efflorescence, and how can you prevent it? This article will guide you through understanding its causes, how to remove it effectively, and the steps to prevent its reoccurrence using Nippon Paint’s recommended coatings system for both interior and exterior walls.
What Causes Efflorescence?
Efflorescence occurs when water-soluble salts present in porous materials such as concrete, brick, or masonry migrate to the surface. This phenomenon typically happens in areas where there are cracks or high moisture levels. Here’s how it occurs step-by-step:
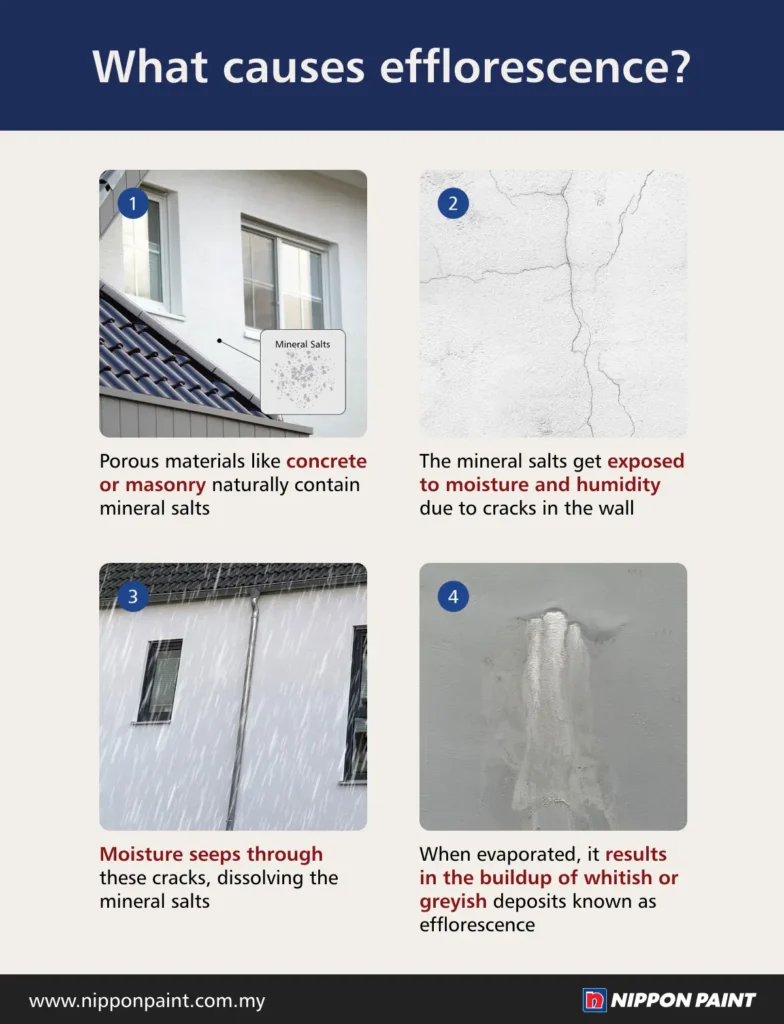
1. Presence of Mineral Salts in Walls
Porous materials like concrete or masonry naturally contain mineral salts. These salts remain inside the material until moisture or water movement causes them to migrate.
2. Exposure Through Cracks
When cracks develop in the wall, they expose the inner mineral salts to external elements like rain or humidity.
3. Water Infiltration
Rainwater or moisture seeps through these cracks, dissolving the mineral salts inside the wall.
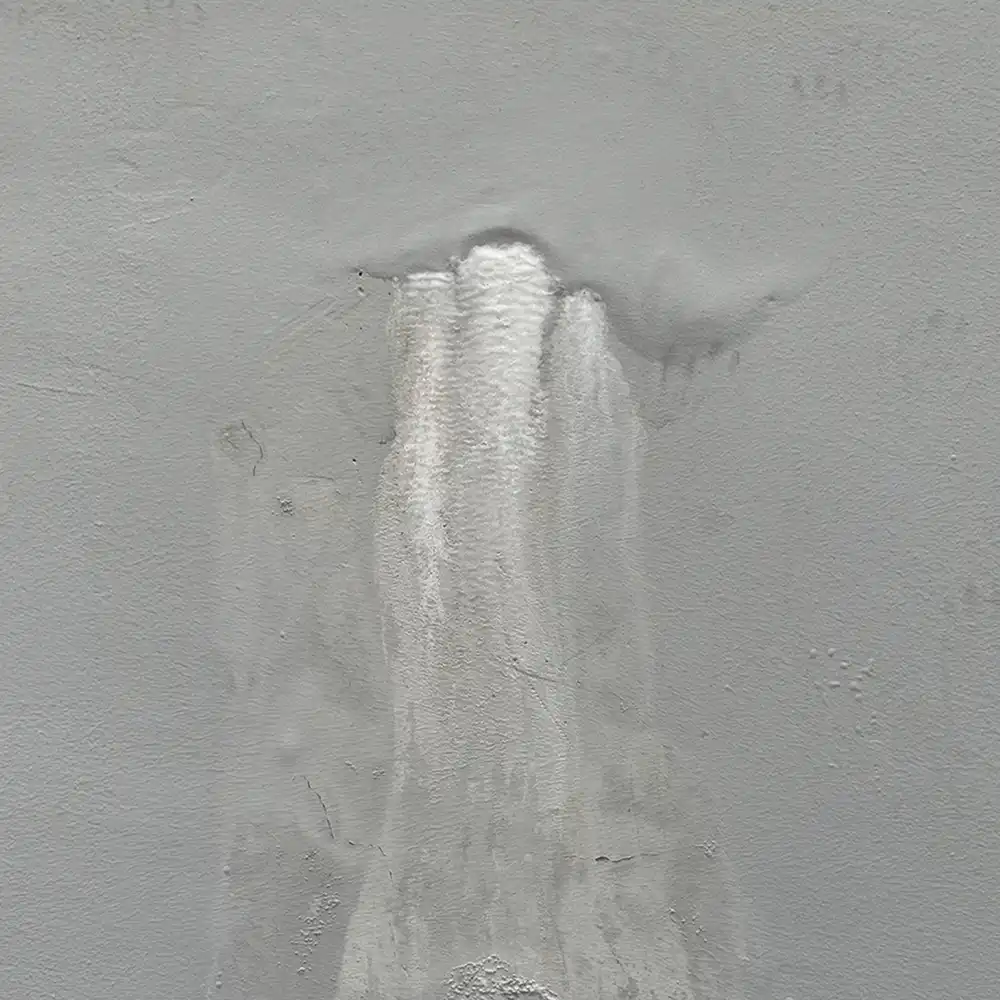
4. Salt Deposits on the Surface
As the water evaporates, the dissolved salts are left behind, forming a whitish or greyish deposit on the surface, commonly referred to as efflorescence.
This issue is most common on exterior walls, areas near windows, and other surfaces exposed to high moisture levels.
How to Remove Efflorescence
Before you can prevent efflorescence, it’s crucial to address existing deposits. Here’s how you can effectively remove it:
Step 1: Clean the Affected Area
Wash the efflorescence-affected area thoroughly using a high-pressure water jet. This helps to remove white salt deposits, dirt, and dust from the surface. For more stubborn deposits, use a soft brush and water to scrub gently.
Step 2: Ensure the Surface Is Dry
After cleaning, allow the wall to dry completely. Any trapped moisture can lead to recurring issues, so proper drying is essential before proceeding to the next steps.
How to Prevent Efflorescence
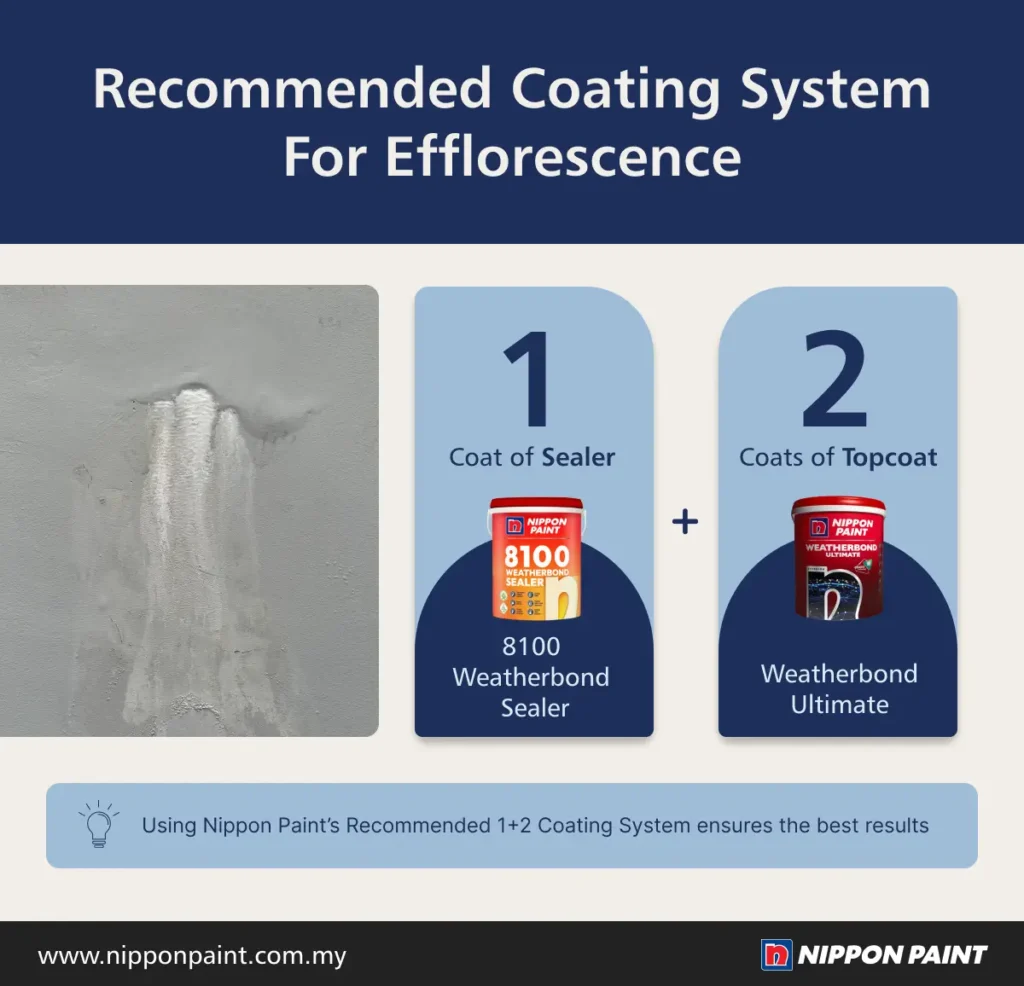
Once the surface is cleaned, it’s time to take steps to prevent efflorescence from returning. Using Nippon Paint’s 1+2 coating system which involves one layer of sealer and two layers of topcoat can effectively protect your walls from efflorescence. Here’s how:
Step 1: Surface Preparation
Start by ensuring the wall is free from existing efflorescence deposits, cracks, and debris. Clean the surface thoroughly as described earlier. To prevent water infiltration, address any cracks in the wall. For hairline cracks, use Nippon Paint Flexiseal Elastomeric Membrane, which is designed to seal and protect smaller cracks effectively. For larger cracks, apply Nippon Paint Crack Repair 1000. Ensuring all cracks are properly filled and sealed will help prevent moisture from seeping into the walls, reducing the chances of efflorescence reoccurring.
Step 2: Apply a Sealer
After preparing the surface, apply a coat of Nippon Paint 8100 Weatherbond Sealer, a premium latex-rich styrene acrylic water-based sealer specifically formulated for exterior use. This high-performance sealer provides exceptional protection for finishing coats by resisting efflorescence and alkalinity, two common issues caused by Malaysia’s humid and rainy climate.
With its excellent hiding and high build properties, 8100 Weatherbond Sealer promotes a richer colour appearance while ensuring strong adhesion for the topcoat. It is ideal for both new walls and repainting projects, creating a solid foundation for a long-lasting and beautiful finish.
Step 3: Apply Two Coats of Topcoat
After the sealer has dried, apply two layers of a high-quality topcoat to ensure maximum protection and a beautiful finish. For exterior walls, use Nippon Paint Weatherbond Ultimate, a premium acrylic-silicone-based exterior paint designed for long-lasting durability.
Weatherbond Ultimate is formulated with Quartz and Fibra Technology, which creates a hard and tough paint film reinforced with microfibres for superior mechanical strength. It provides exceptional resistance to UV radiation, rainwater, and dirt penetration, ensuring your walls stay vibrant and protected. With up to 15 years of protection, this advanced paint is ideal for Malaysia’s harsh weather conditions, keeping your exterior walls looking new for years to come.
Why Prevention Is Important
Efflorescence not only affects the appearance of your walls but can also lead to long-term structural damage if left untreated. The accumulation of mineral salts can weaken the wall’s surface and cause paint to peel or crack over time. By taking proactive steps with proper surface preparation and using high-quality sealers and topcoats, you can effectively prevent efflorescence and protect your walls from future damage.
Conclusion
In Malaysia’s challenging climate, where humidity and frequent rainfall are part of daily life, protecting your walls against moisture-related problems is essential. With proper maintenance and Nippon Paint’s advanced solutions, you can enjoy a home that looks fresh, vibrant, and well-protected for years to come.
Efflorescence is a preventable issue if tackled correctly. By understanding its causes and following the right removal and prevention methods, you can keep your walls clean, strong, and free from unsightly deposits. Nippon Paint’s 1+2 coating system, which involves one layer of Nippon Paint 8100 Weatherbond Sealer as the base and two layers of Nippon Paint Weatherbond Ultimate as the topcoat, ensures the best finishing and long-lasting protection. This comprehensive system effectively resists efflorescence, shields against moisture, and maintains the durability and aesthetic appeal of your walls for years to come.